Operational: January 2024 –
A 7” quad build, featuring a foldable frame to make it more portable. I wanted to build a drone that supports a slightly longer fly time yet be capable of freestyle stunts and manoeuvres. With a 2400 mAh battery, I should get about 10-15 minutes of flying, rather than 4-5 minutes on my Baboon 5″ quad. I’m using foldable props to make it easier to fit in a backpack.
Posts
Posts related to Deadcat.
Components
Below are the components I have on this quad.
| Part | Manufacturer |
|---|---|
| Frame | Axisflying Kolas 7” |
| Flight Controller | Mamba MK4 F722 FC (20 x 20 mm mount) |
| ESC | Mamba Mini F65_128K ESC (20 x 20 mm mount, 65A ESC) XT60 connector (male) for power with 2.5mm securing bolts |
| Motors | iFlight XING2 3110 1250KV 6S |
| VTX | Walksnail Avatar v2 dual antenna HD (25.5 x 25.5 mm mount) Walksnail 20cm camera cable (20cm extension required for this frame) TrueRC Matchstick LHCP UFL 115mm antennas (UFL enclosure removed to fit Avatar) |
| RX | TBS Crossfire Nano RX |
| GPS | iFlight M8Q-5883 GPS Module VIFLY GPS Mate (with buzzer) |
| Buzzer | Included in VIFLY GPS Mate |
| Props | Dalprop foldable 7” |
| Batteries | LiPo CODDAR 6S 2800 mAh 110C / 62.15 WH LiPo DOGCOM 6S 2400 mAh 120C-240C / 53.28 WH LiPo Tattu R-Line V3.0 1550 mAh / 34.41 WH |
| Camera | GoPro Hero 11 |
Metrics
Various metrics for the drone.
| Metric | Details |
|---|---|
| Weight (quad only) | 670 g |
| Weight (quad + GoPro Hero 11) | 860 g |
| Weight (quad + 2800 mAh battery & GoPro Hero 11) | 1250 g |
| Dimensions (expanded, with open props) | 39 x 32 x 7 cm (W x L x H) |
| Dimensions (folded, with closed props) | 16 x 25 x 7 cm (W x L x H) |
Wiring Reference

Construction
Owing to the folding functionality of the Kolas 7″ drone frame, a challenge in the construction is the wire routing. The stock frame comes with reasonable in-frame 3D parts that route the wires, but the wires pop up in strange places when folding. I wanted a cleaner look, so I created 3D parts that route the wires slightly differently. I also wanted a tail mount to hold the two Avatar antennas and a XT60 socket.
Here is the stock frame and 3D printed parts:

A bare frame reduces width from 27cm to 9cm making it very easy to fit a 7″ quad into a backpack:

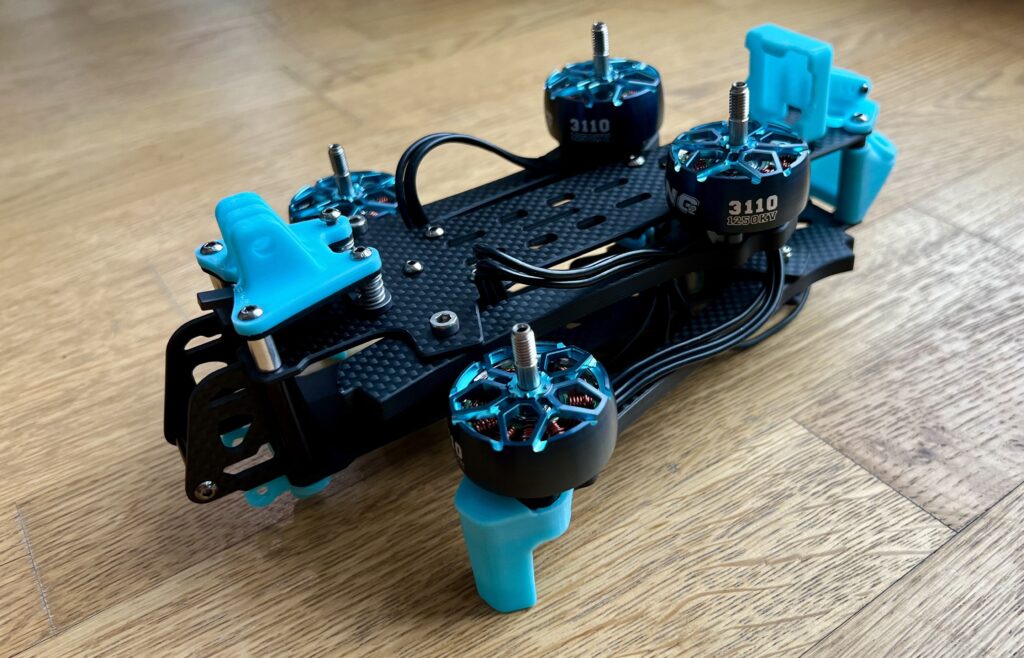
Adding the motors shows the wiring challenge – the stock 3D parts are not too bad, but I’d like to tidy up the cabling a little bit.

And folded, with the stock 3D parts:

To fit the Avatar HD VTX, antennas and XT60 battery socket, I designed and built some new 3D parts. To improve the cabling, I have routed the front arm wiring under the arm and created a cable protector. To make it easier to mount the Avatar HD, I created a cage on which to mount the component. This is alternative to bolting it to the top frame, which makes it hard to assemble, and impossible to route a second battery strap. Here’s a schematic of the parts:

Assembling the XT60 connector on the tail, and attaching it to the ESC. Careful measurement of cables required so it fits nicely in the frame:

Some preparation cable work, readying the routing of the motor cables:

Now mount the ESC to the frame and solder the motor cables to the ESC. Again, careful wire routing and measurement required, as the space inside the frame is tight if one wants the arms to fold smoothly.

The remaining soldering involves soldering the Crossfire module and GPS to the flight controller. Everything can then be mounted.

Fitting the Avatar HD VTX in the cradle:

Internals are now installed, and the top cover is now ready to mount. This will enable the front arms to be fitted.

Assembly completed …

The drone can be closed for transport, or open for flight:

The quad is now ready to fly!

Flights
Pictures as the quad swings into action.

