After RXLOSS resulting in a lost drone in the mountains, and then almost losing another in a snowy field, I decided to move from FrSky R-XSR to TBS Tracer – the new low-latency setup from TBS. Here’s how I did it with a base setup of Betaflight & OpenTX.
Extend FrSky XLite-Pro external mode to recognise crossfire
The TBS Tracer uses the external transmitter mode of crossfire “CRSF” to communicate. If you installed the FrSky XLite Pro firmware the external transmitter mode “CRSF” doesn’t exist as an option. To get this working, you need to flash an OpenTX firmware that enables non-certified firmwares. In brief:
- Download OpenTX Companion 2.3.9 (at time of writing)
- In OpenTX Companion configure your radio (edit settings -> radio profile) to enable flexr9m. Based upon your preferences, lua and others may also be helpful
- In OpenTX Companion download the firmware (file -> download -> download firmware)
- In OpenTX Companion download the firmware (file -> download -> download SD contents)
- Copy the SD Contents to a FAT32 SD card and apply any post-install changes (like voice pack changes, etc)
- Connect the XLite Pro to the USB port and flash the firmware
- If you get a version mismatch on restart, ensure the SD card is using the same version as the firmware
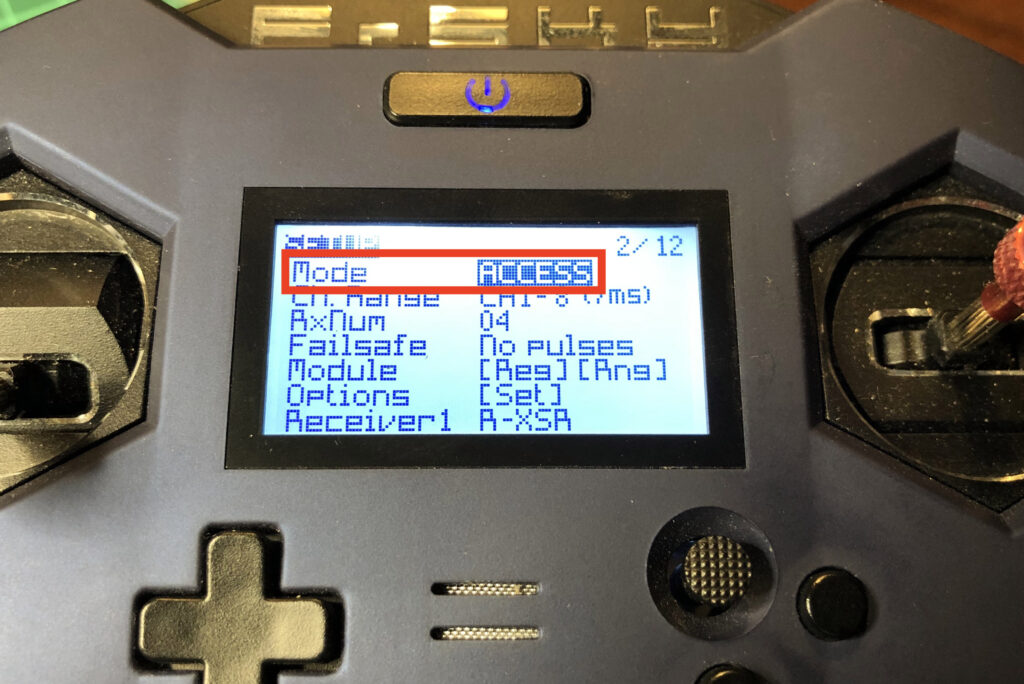
After this upgrade, the option to select CRSF will be available:
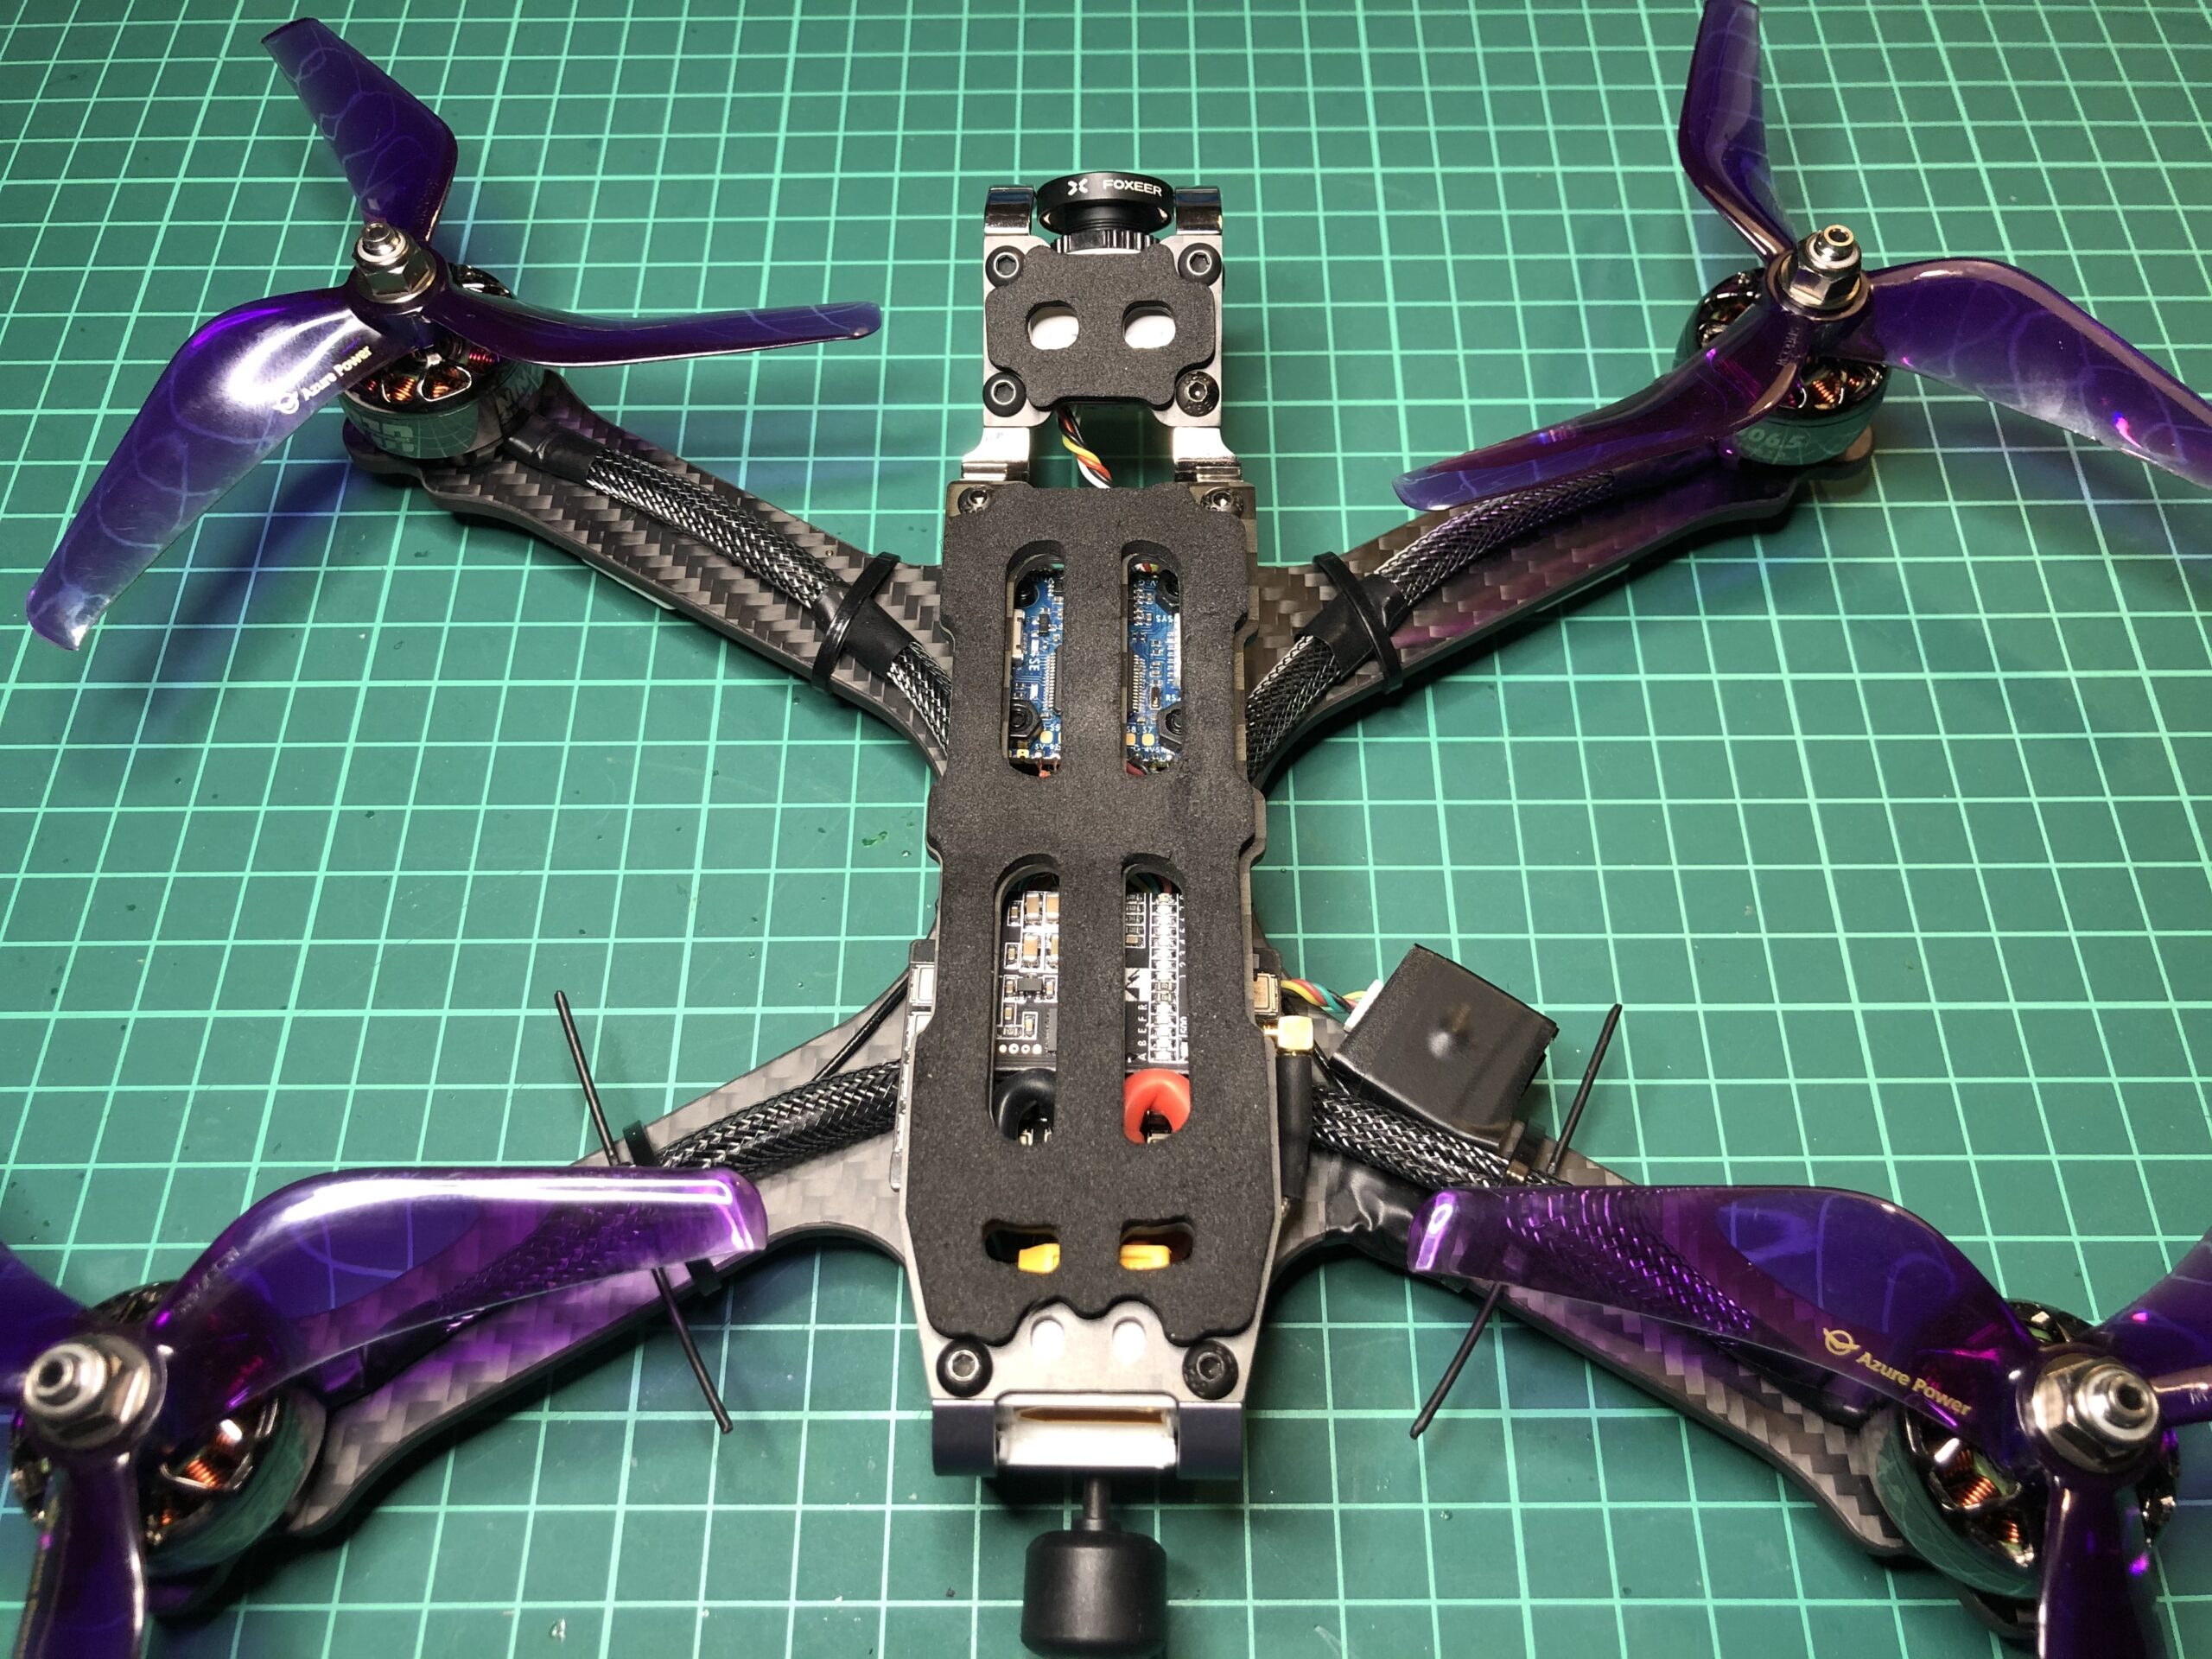
Installing the RX module and antennas on the drone
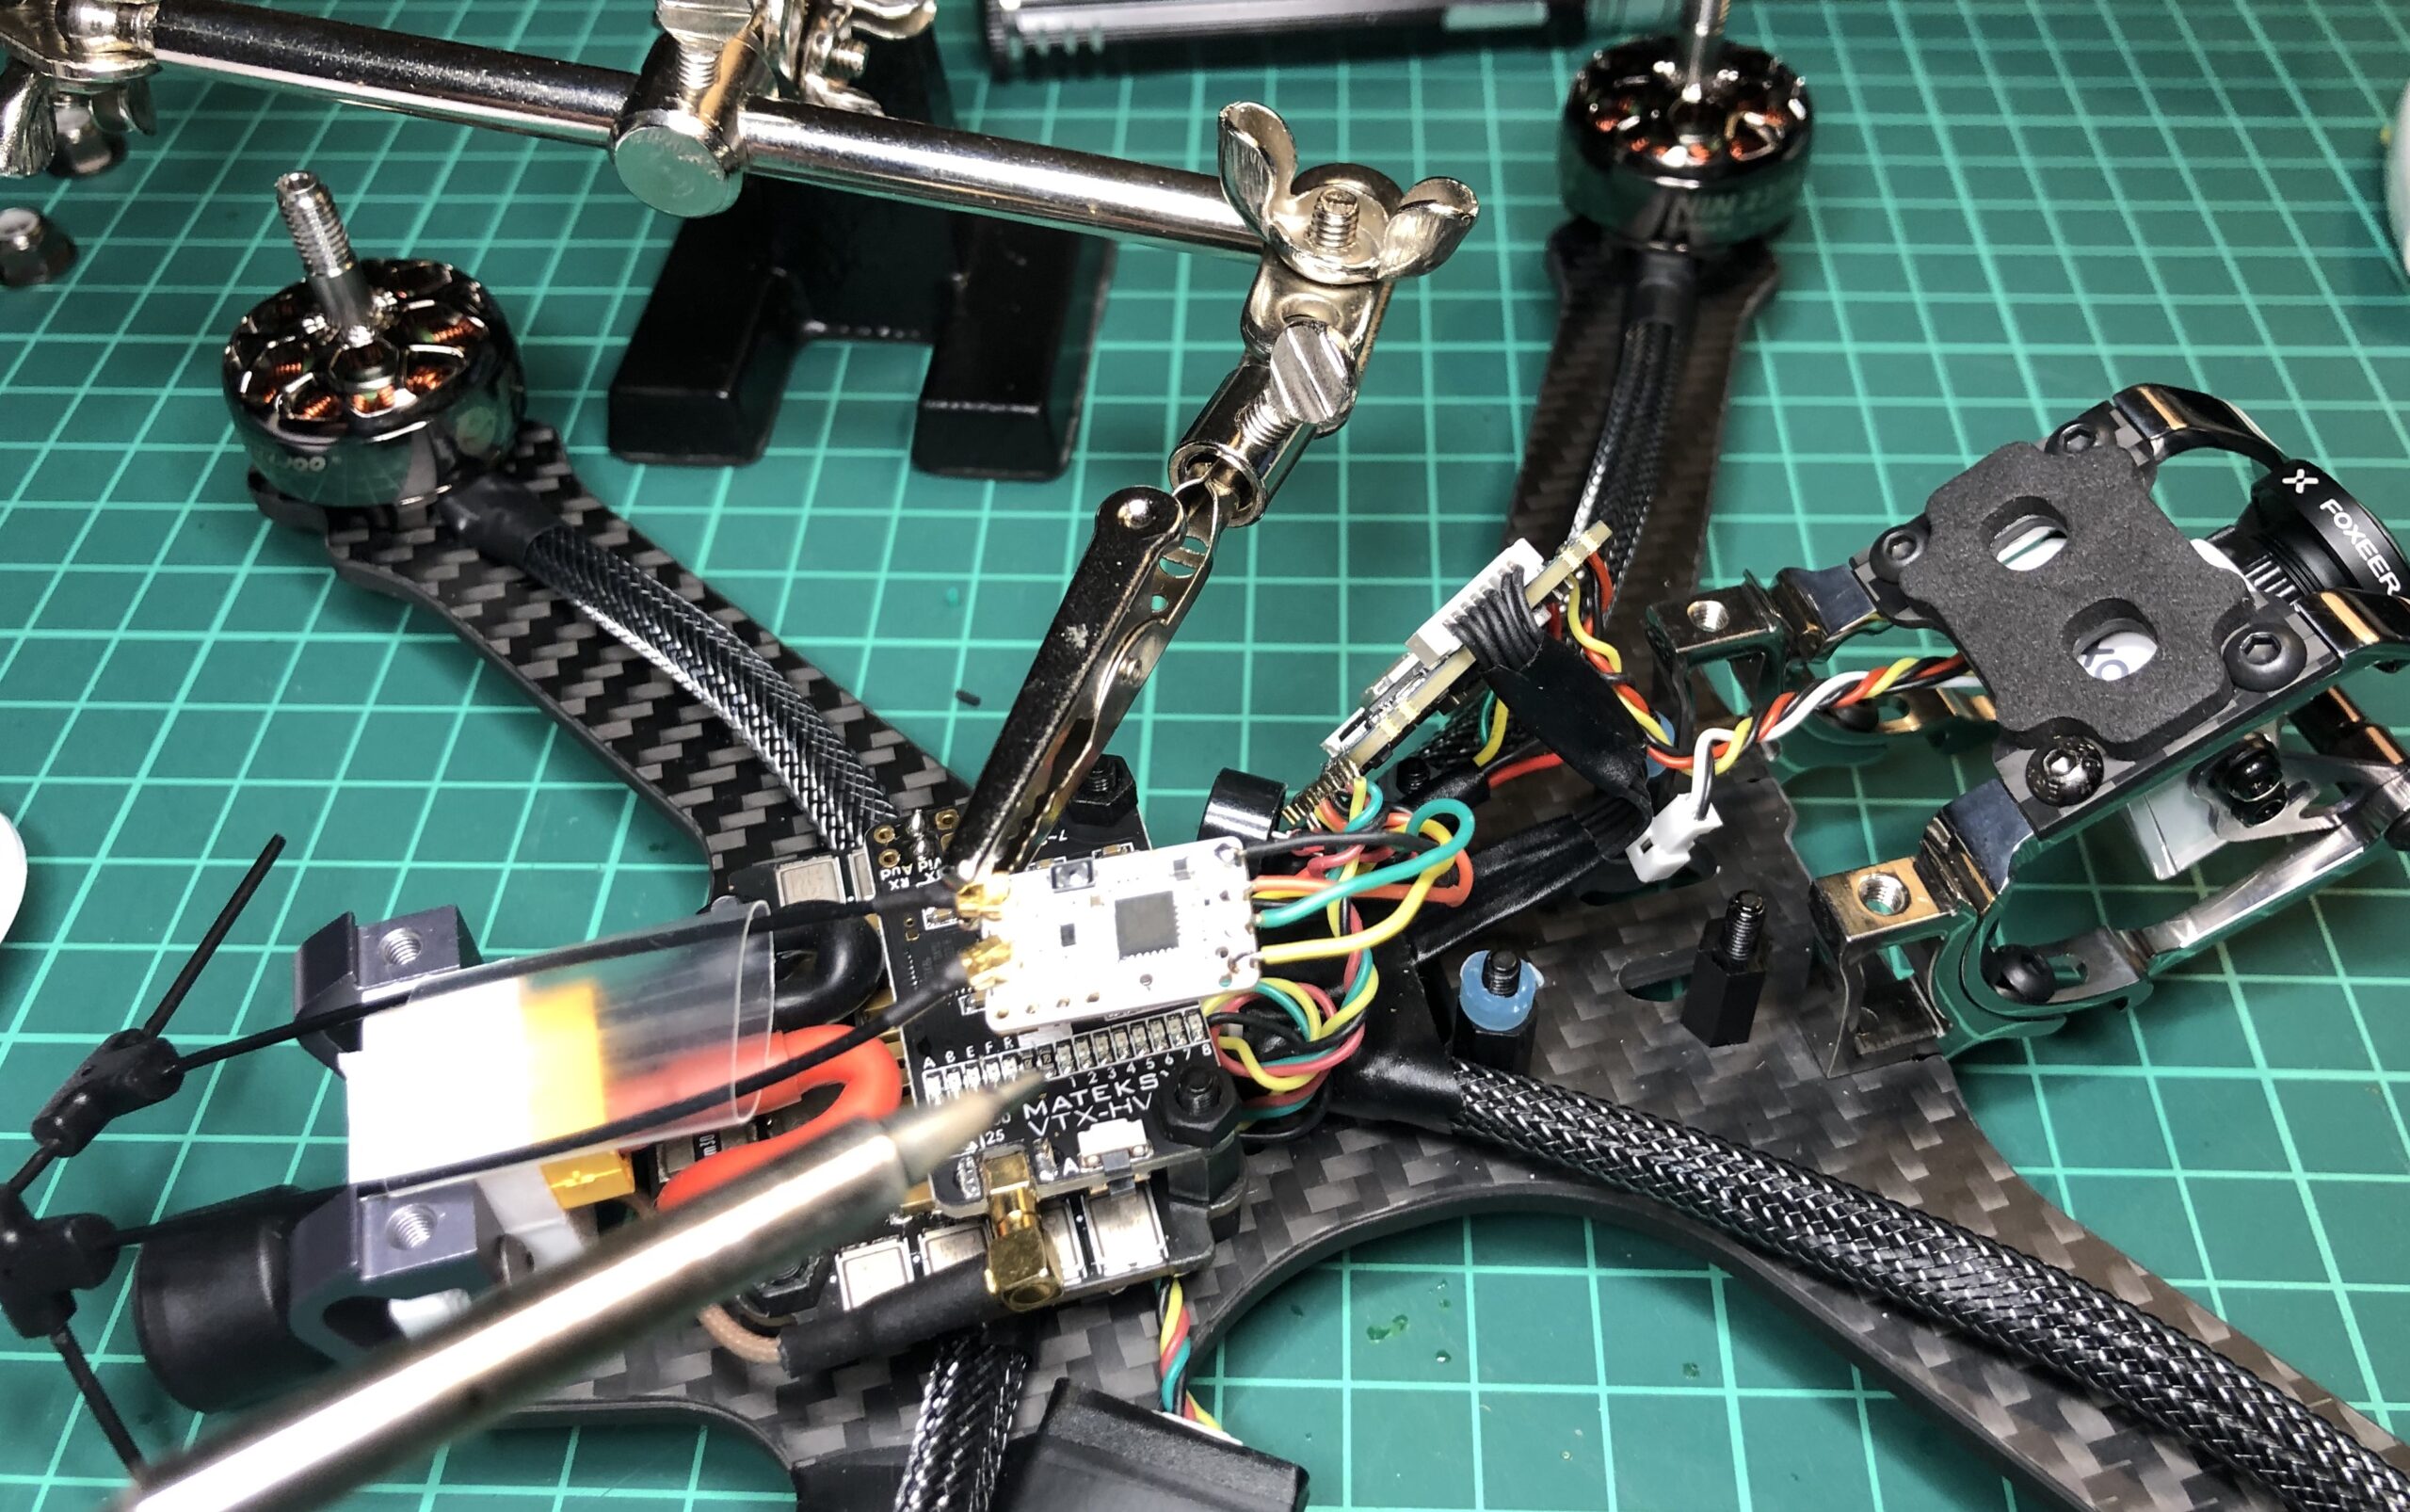
Switching out the R-XSR and installing the TBS Tracer is a straightforward soldering effort. The same RX/TX and GND/5V are used, but connected in a slightly differing order on the RX board. I trimmed the R-XSR connector and soldered the old R-XSR cables onto the TBS Tracer board. Here is the wiring from a TBS Tracer to a Matek F722 flight controller:-

Soldering in action:
Next up – the two “Minimortal” antennas need to be mounted in a crossfire-appropriate manner on the drone. See these articles:
- TBS Antenna orientation – best practices on antenna mounting for crossfire
- Oscar Liang’s best antenna positioning – practical observations and advice on full-size crossfire antennas
Here are the two locations I prefer, as they offer an acceptable balance between radio reception (away from carbon-fibre) versus installation security (clear of props) versus transport ease (flat). Best secured by zip-ties.
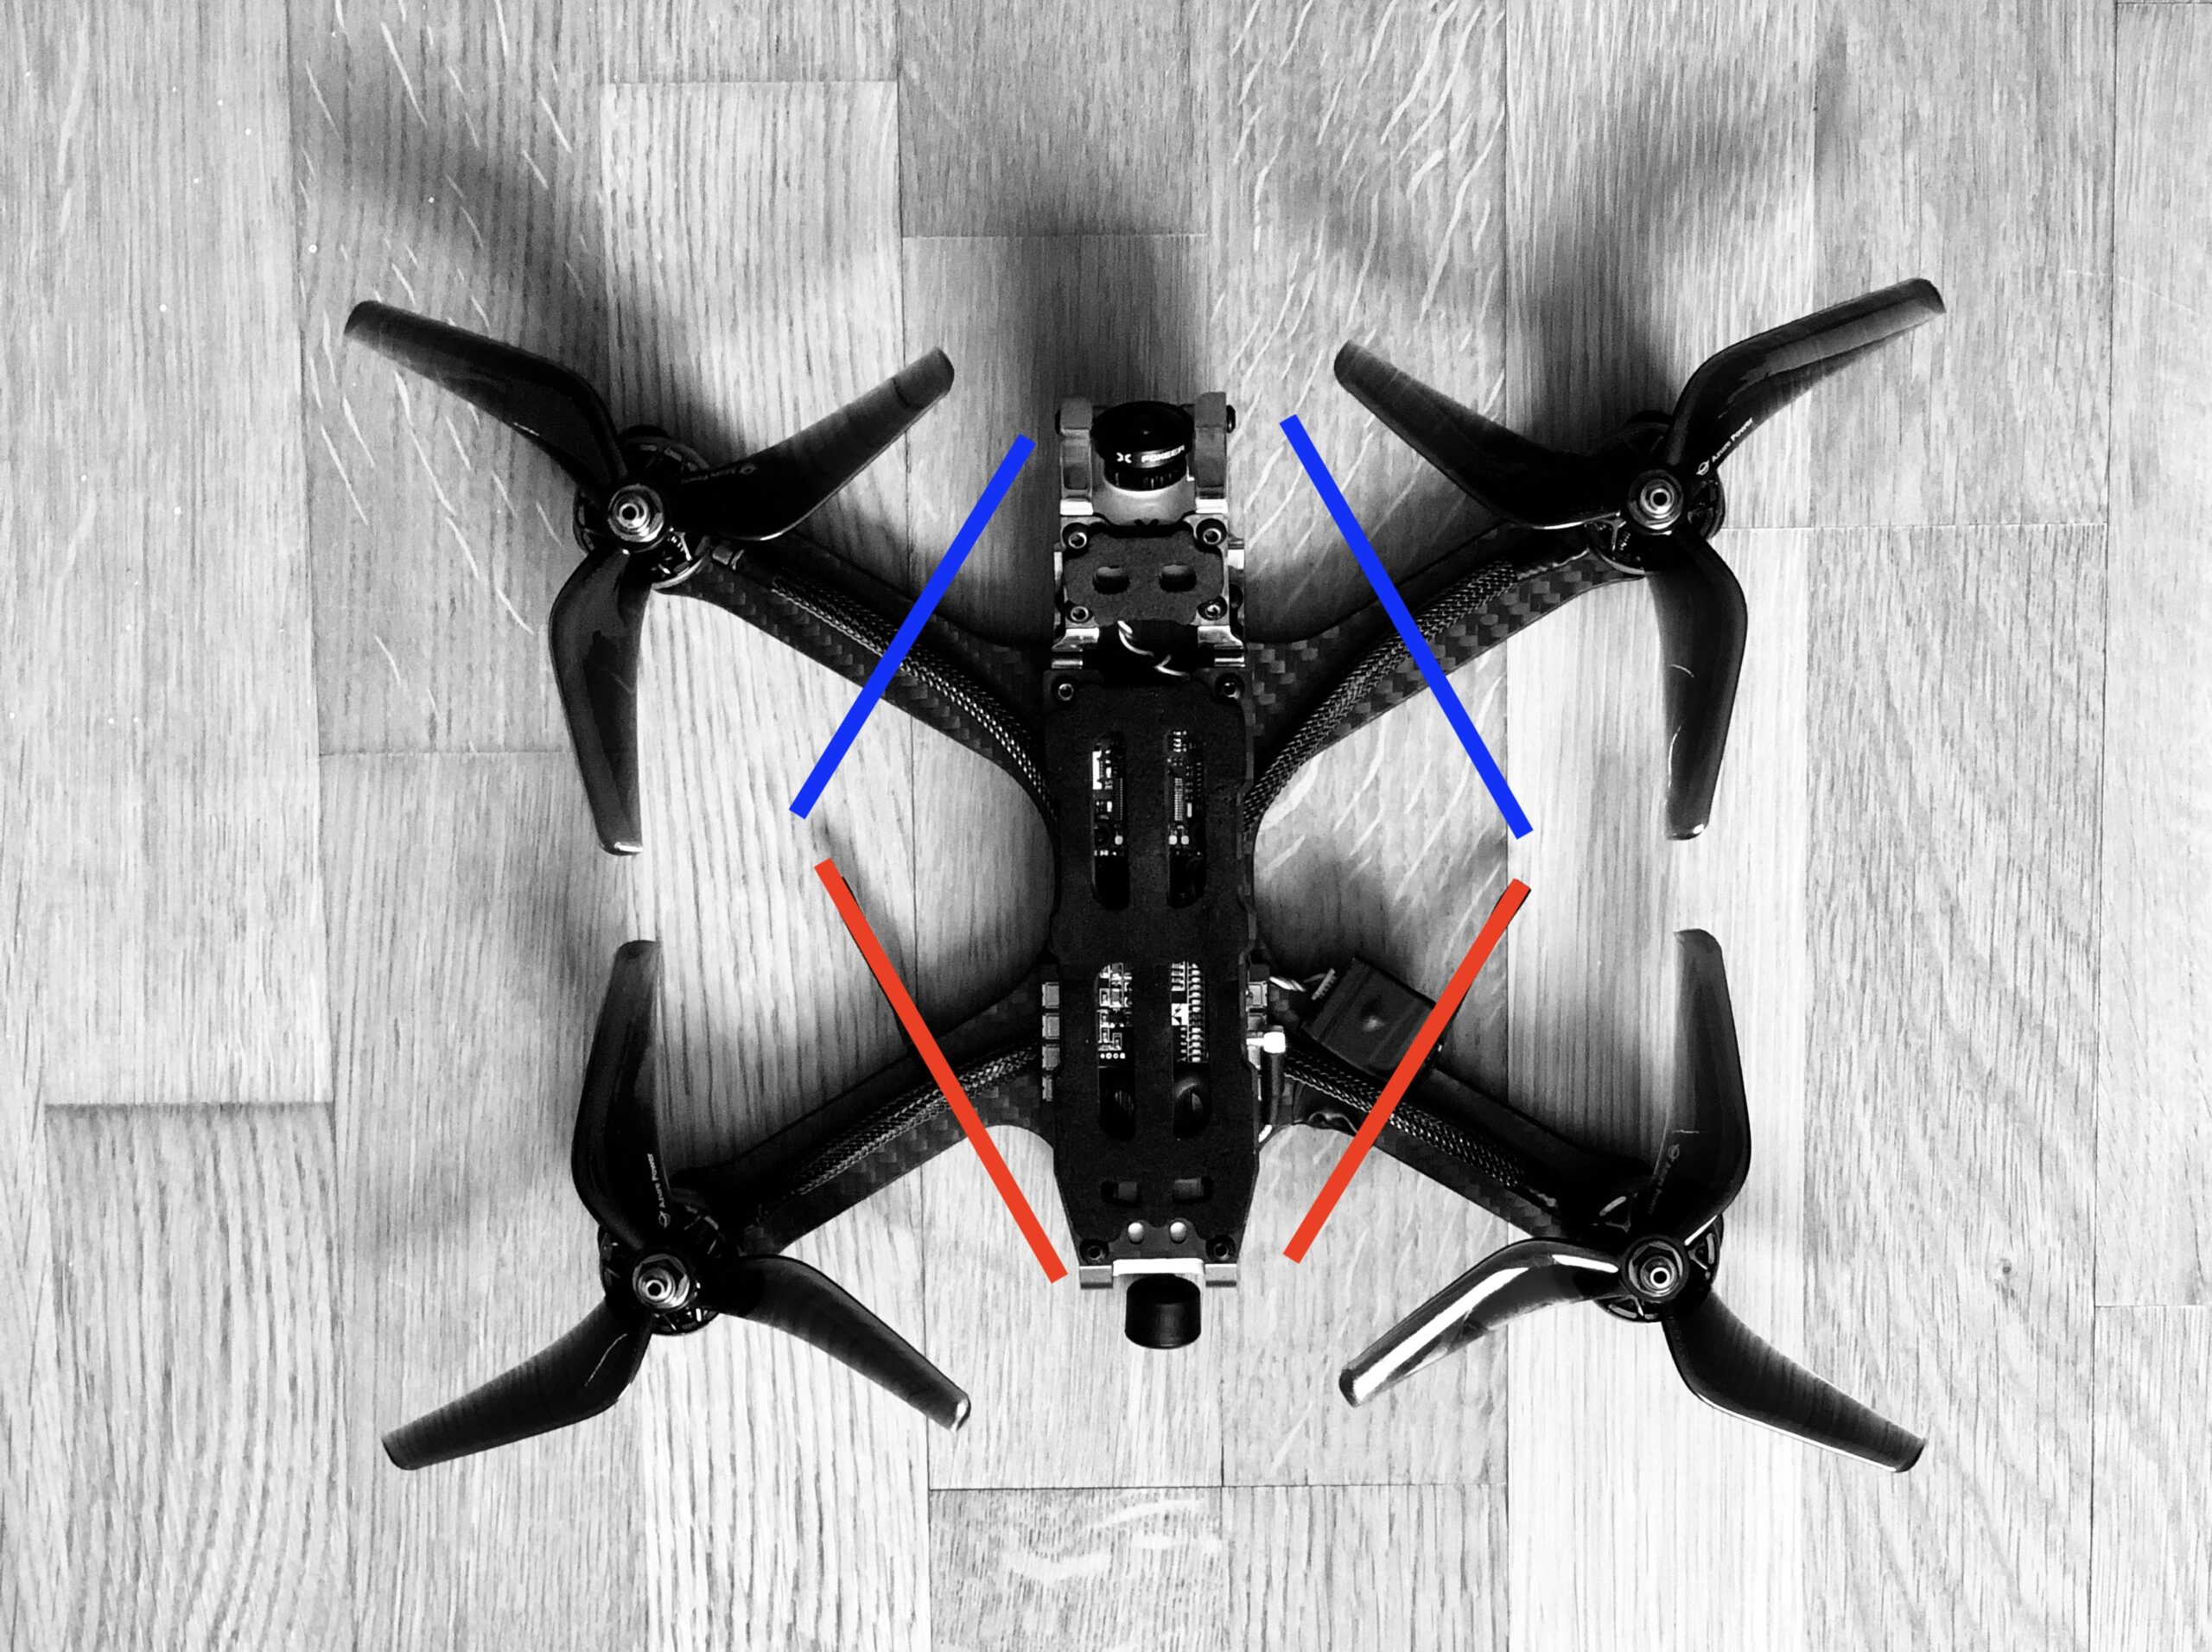
I chose the rear antenna mounting, securing with zip-ties:
Pair the RX and TX Tracer modules
Time to pair the RX and TX modules! I use the following steps, based upon the TBS Tracer PDF manual :-
- Turn on the XLite-Pro (with the TBS Tracer module attached)
- Within the OpenTX model setup menu settings:
- Set the internal RF to off
- Set the external RF to “CRSF” (if you don’t have CRSF as an option, see the first section of this page)
- Set the “Channel Range” to “CH1-16“.
- The TBS Tracer unit should show a lit up LED on the reverse, in yellow
- Power-up the drone and press the button on the back of the TBS Tracer module to bind (it should happen automatically if the RX module is factory new)
- Check the TBS Tracer unit LED is now lit up in green. It may prompt to install updates.
Configure drone Betaflight settings
Betaflight settings for the receive settings and OSD settings need to be changed. Connect the drone flight controller to the computer and run Betaflight configurator. This is assuming that Betaflight 4.1 or greater is installed on the drone.
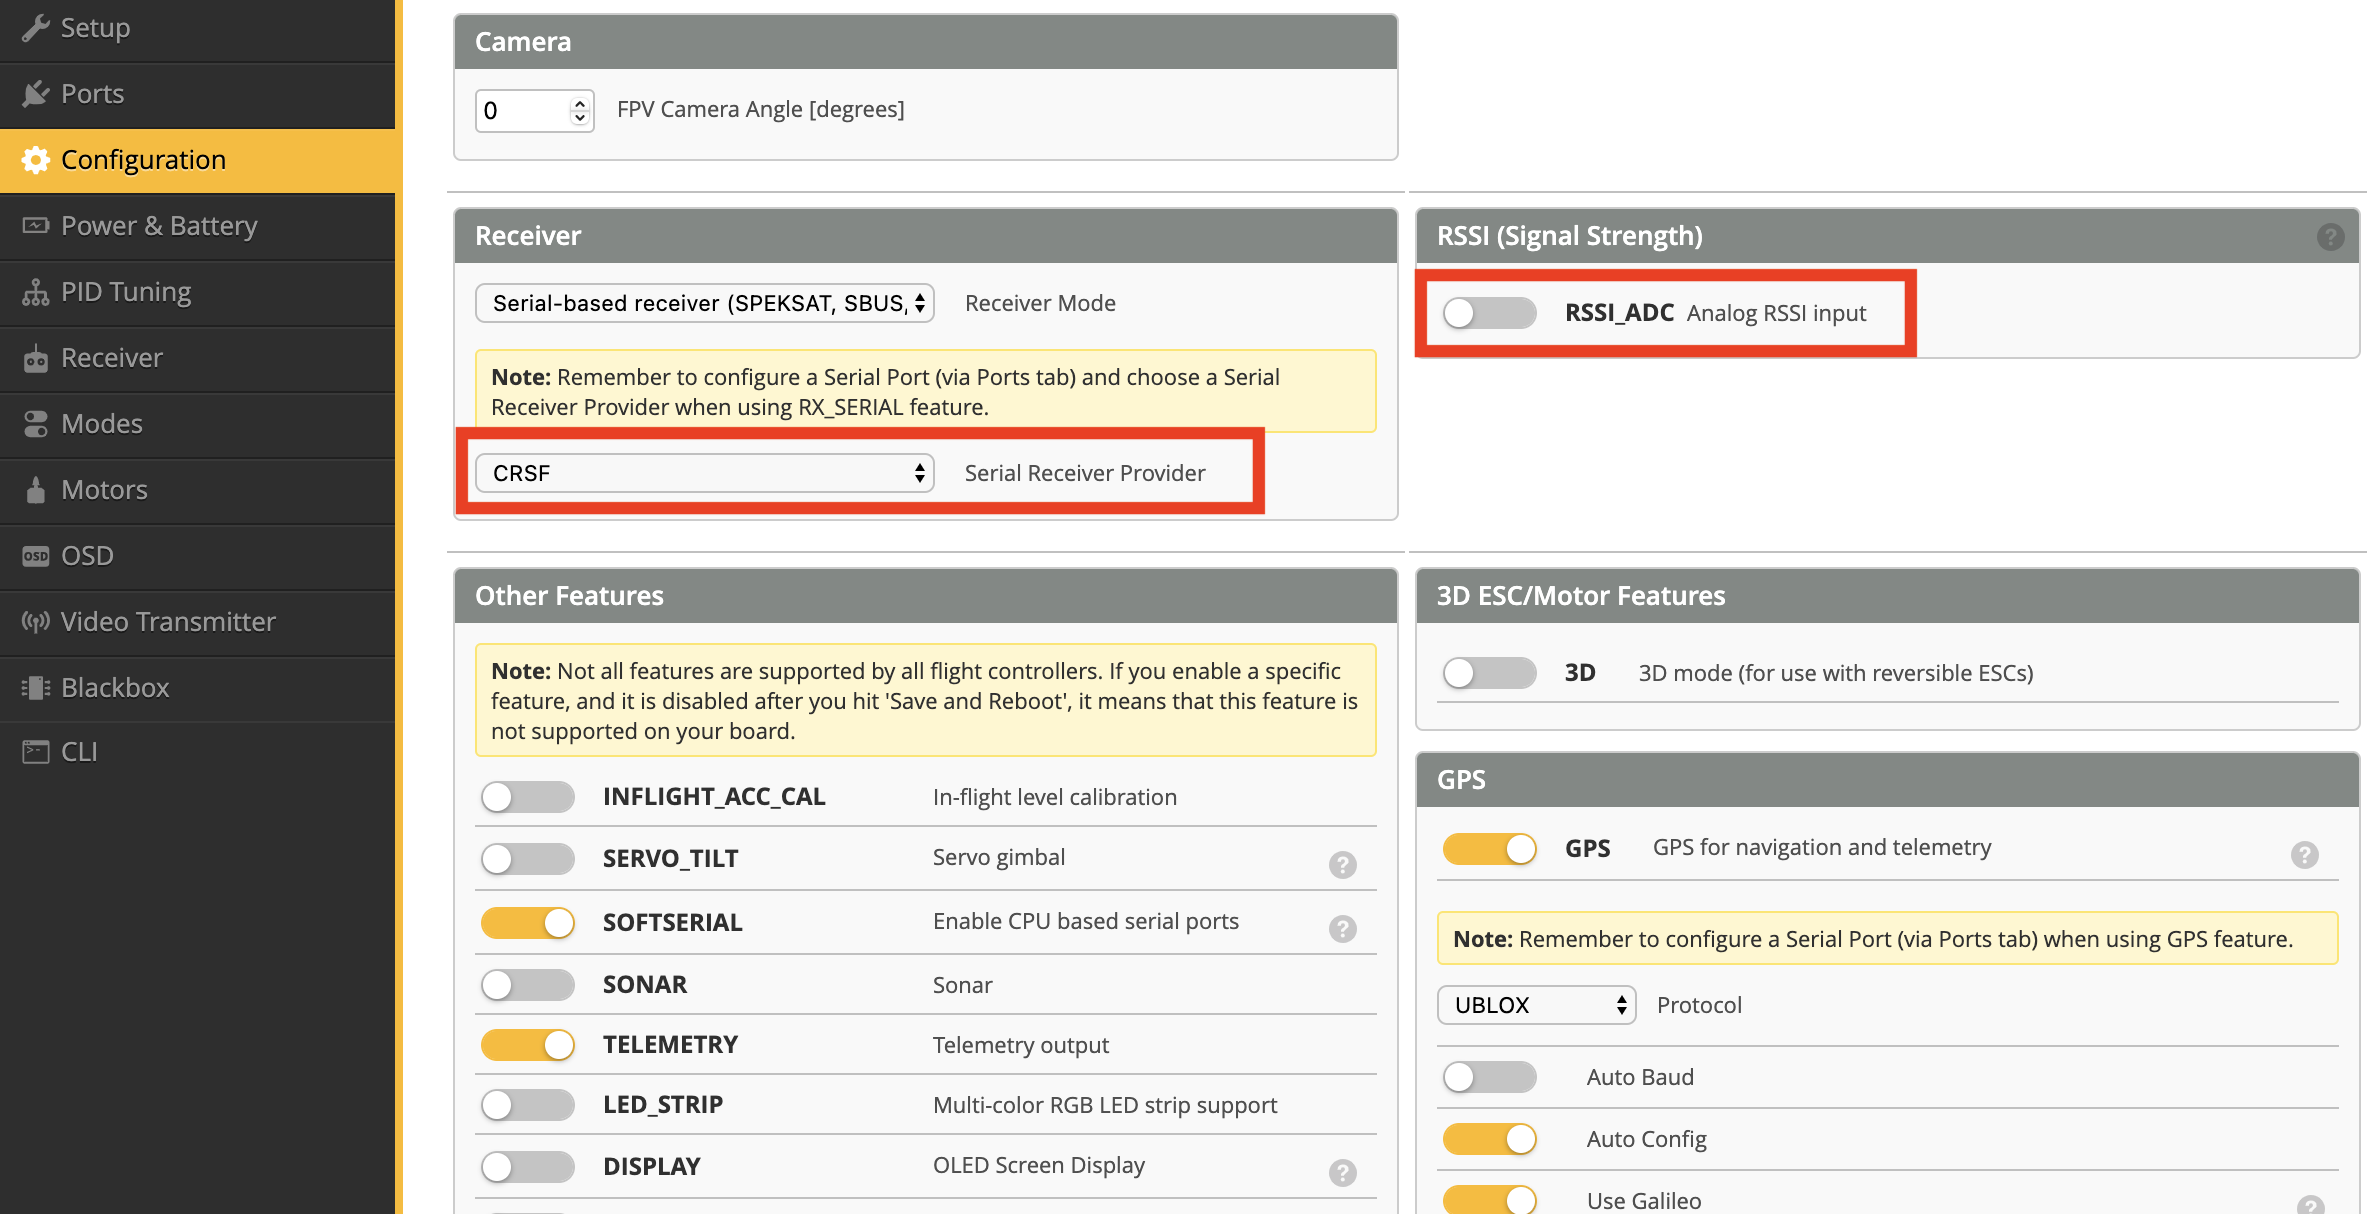
Adjust and save settings for the “Receiver” page, ensuring selection of the “CRSF” protocol. Additionally, disable RSSI_ADC, otherwise the Link Quality OSD setting won’t work correctly:
Now navigate to the “OSD” and ensure “RSSI dBM” and “Link Quality (LQ)” are enabled and positioned appropriately. Also set warnings for Link Quality and RSSI dBm. Check Oscar Liang’s helpful LQ vs RRSI page and Crossfire page for more information on these topics.

Finally, navigate to the “CL” page and define the link quality alarm threshold by entering the following commands in the CLI:
set osd_link_quality_alarm = 50
save
The drone will reboot. If all looks good, it’s now time to run flight checks!
On top of normal flight checks, I ran through the following items:
- Removing the SoftSerial port in order that all FC telemetry is available
- In OpenTX, refreshing the telemetry inputs and configuring my display preferences
- Checking the failsafe works correctly (with props off) 🙂
- Checking the OSD looks as I want (RSSI to LQ display reconfiguration)
Hi im from Switzerland too.
I had the Frsky R9M, and i must say that it is the biggest shit i had ever for my Kwads.
I couldnt fly more then 500 meter with 1 Watt.
So i decidet to change to Tracer and thank god its working.
In the end i put all my Frsky Recievers in the Trash.
Greez from Brugg
Oh man, sounds exactly the same with the R-XSR. I lost one drone in the mountains, and then had it on several occasions do RXLOSS fails nearby. The TBS Tracer is better in so many ways. Greets from Zürich
Hi. This looks great and I am very interested in swapping out my R-XSR RX. Does the x-lite Pro allow for simple attachment of the Tracer Nano Tx module or do I have to do some rewiring/hacking?? thanks
Hi Craig, if you buy the “nano” edition of TBS Tracer, it’s a simple attachment that slides onto the rear plate of the X-Lite Pro – no mods required to the X-Lite required. e.g. the bundled fpvracing.ch TBS TRACER Nano TX Starter Set . Enjoy!