
From BetafIight 4.2 onwards, it is possible to configure three OSD (on screen display) views. With opentx installed on my FrSky XLite Pro, and Betaflight 4.3 on my flight controller, I wanted to utilise one of the push buttons to easily cycle between two of the OSD views, changing what I see depending on where I am flying.
Setting up the radio transmitter
This step configures and transmits the switch press from the opentx radio to the betaflight flight controller. If you have a spare 3-way or 2-way switch, you can just map the switch onto one of the active channels on the mixer tab and configure Betaflight. Using a push button is a bit more involved, as one needs to set up what is called an edge switch & sticky logical switch, and then assign this to an active channel.
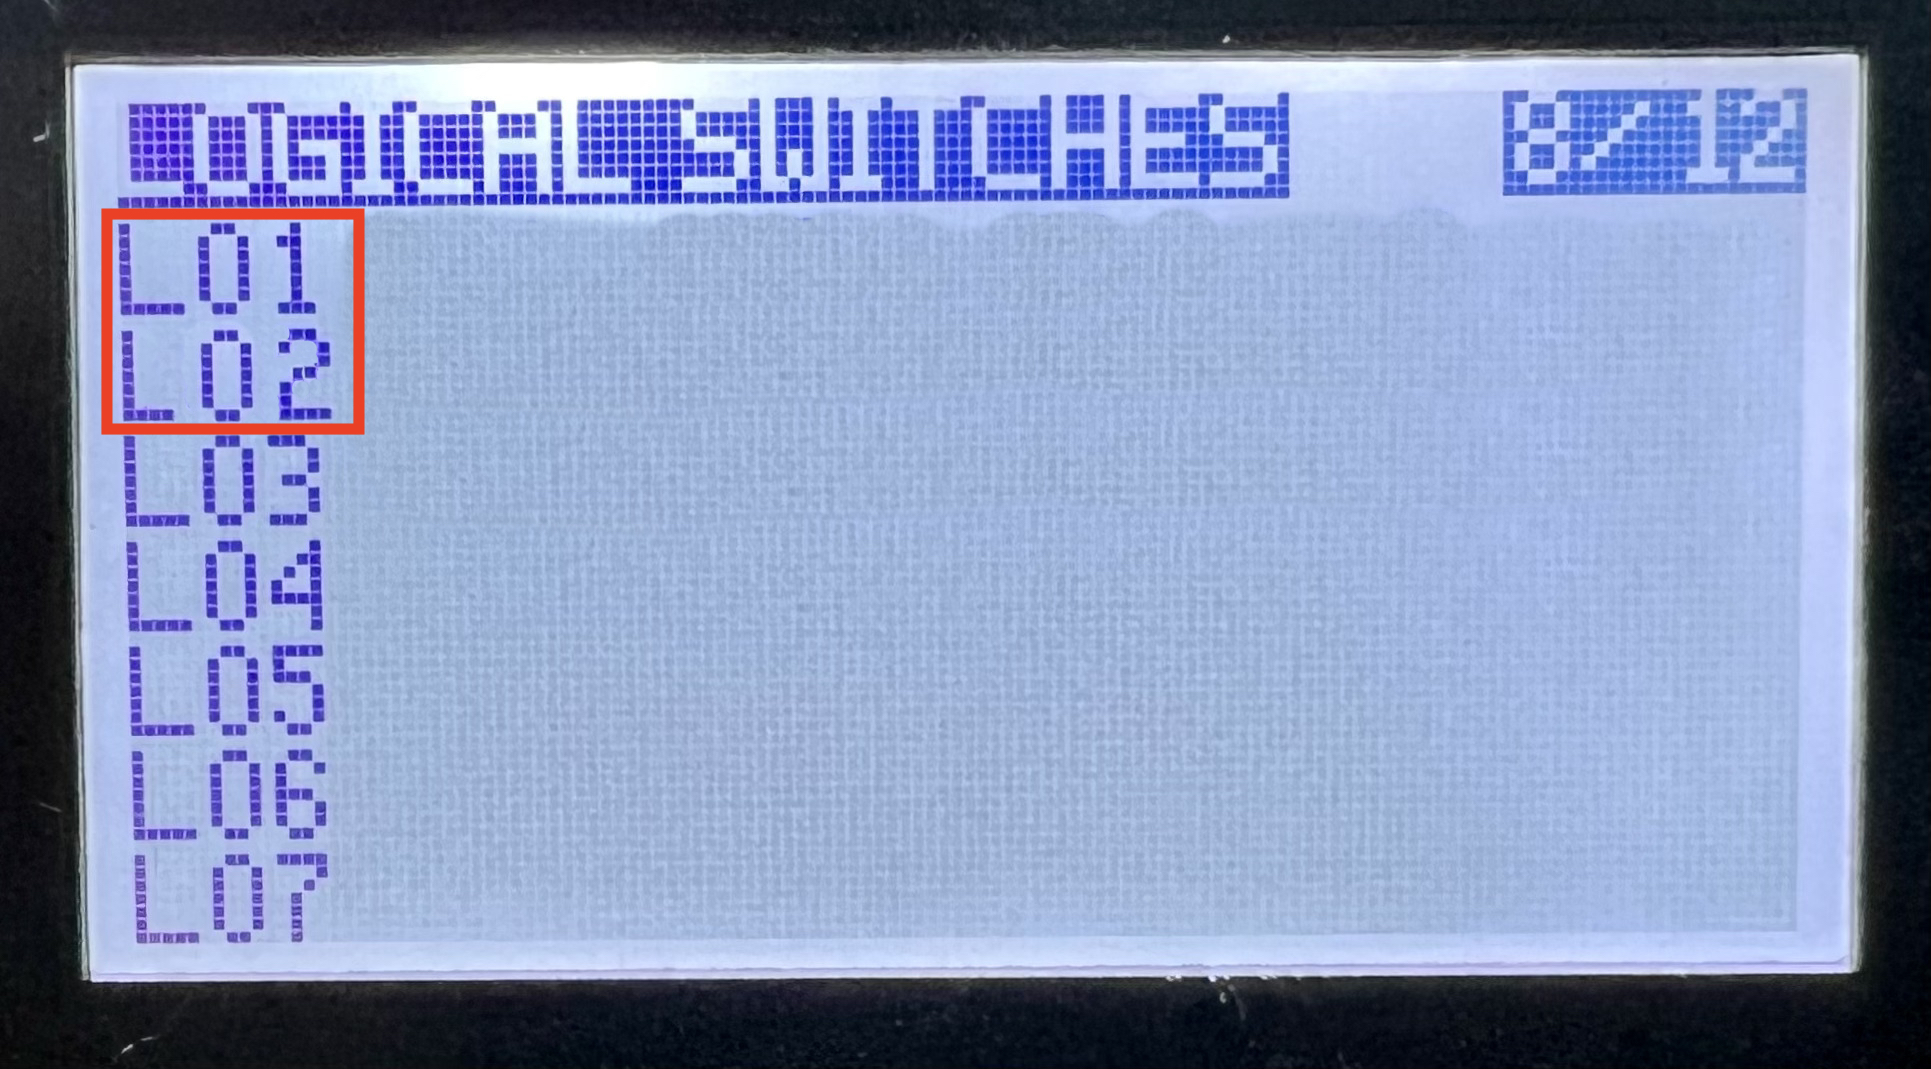
Let’s set up the logical rules. Navigate to the “Logical Switches” menu screen. We are going to add two new logical switches in the next two empty slots. Here the next two empty slots are L01 and L02:
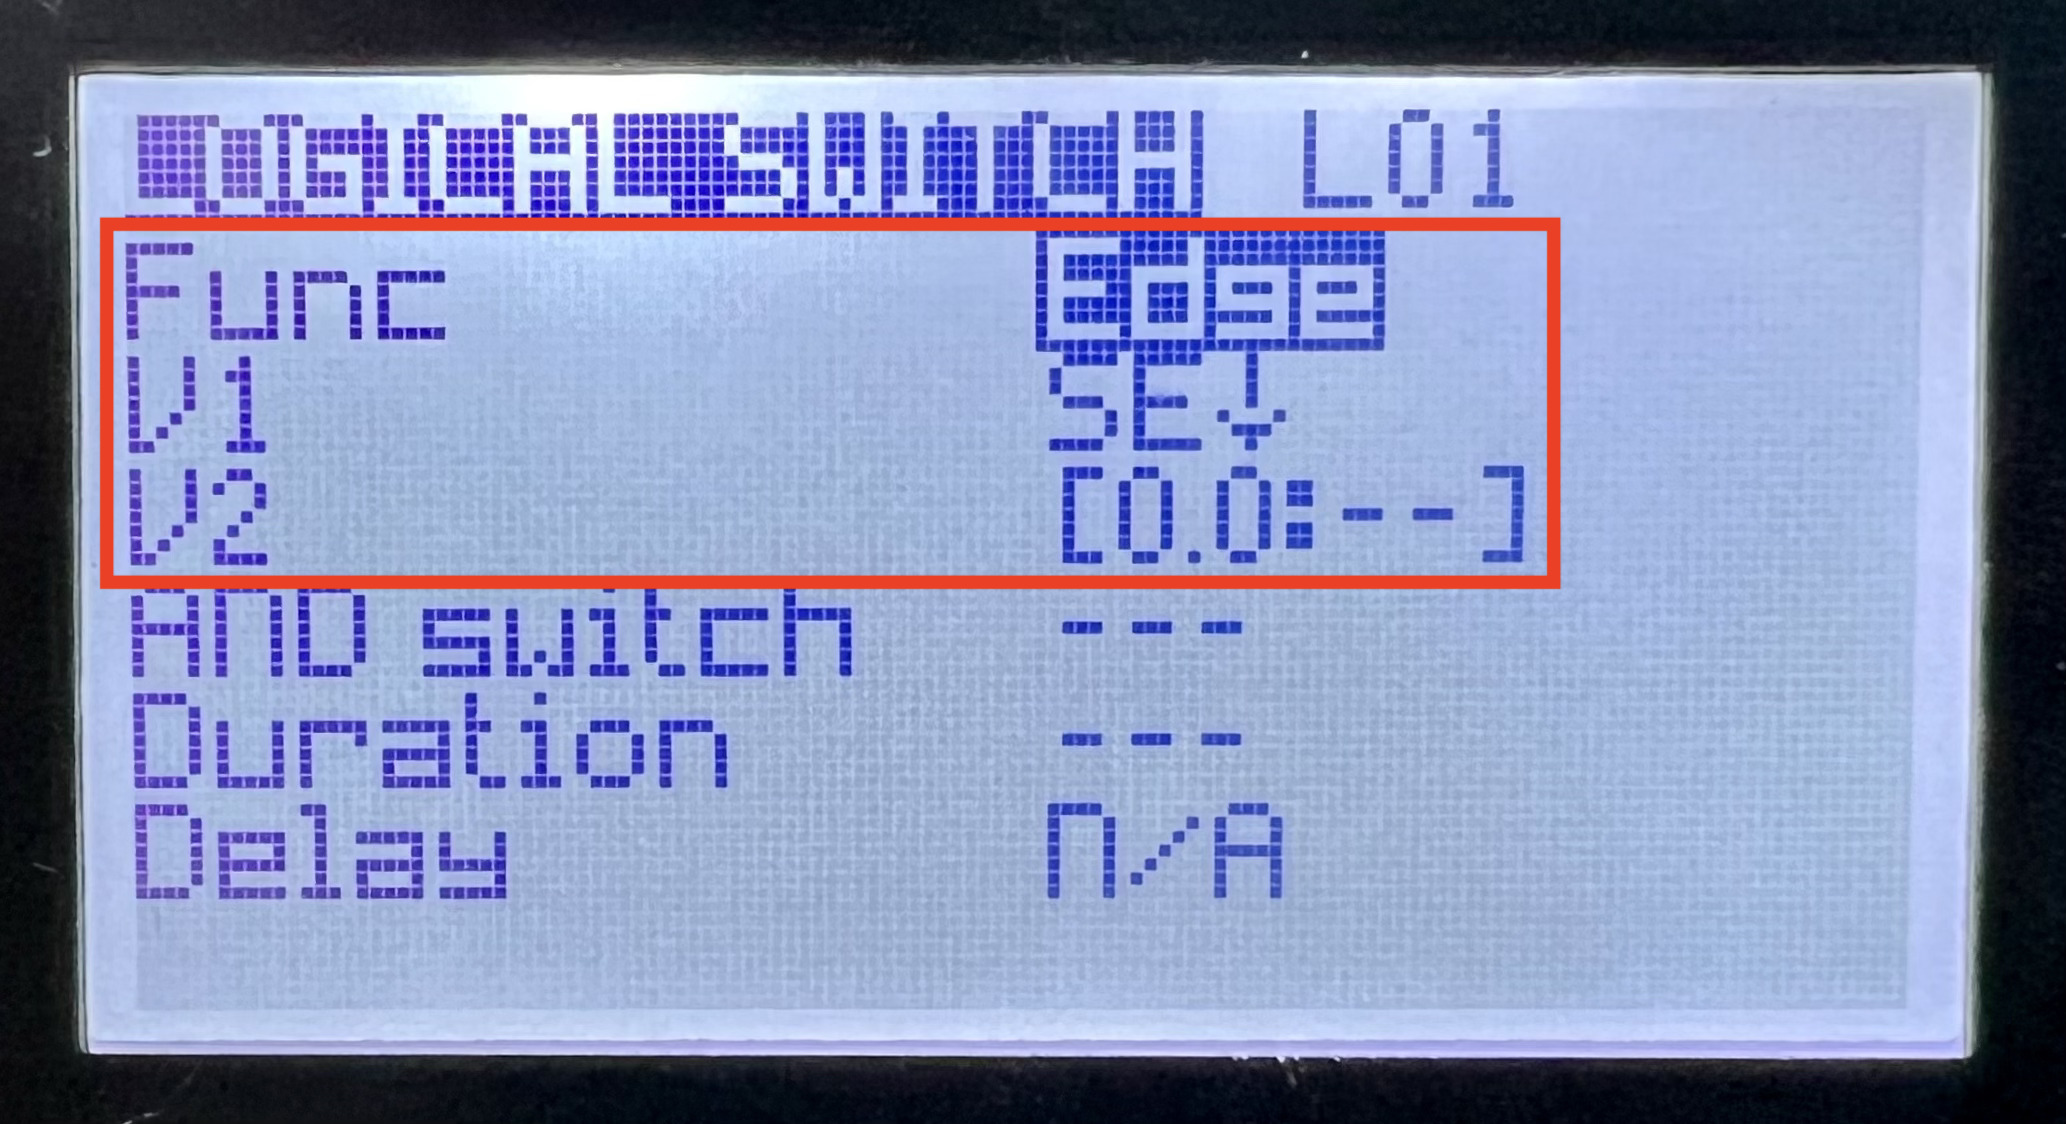
In the first empty slot (here L01), add an “Edge” entry, making a note of the position you added it to (e.g. L01). There are three important entries. The first is setting the “Func” to “Edge”. Scroll down to choose “Edge” from the many alternatives. The next is the “V1”, which sets the trigger switch. You can assign the switch by editing the “V1” entry and pressing the button you want to use. Finally, “V2” sets the timing delay – here we want it as defaults – i.e. it triggers from immediate press to infinity:
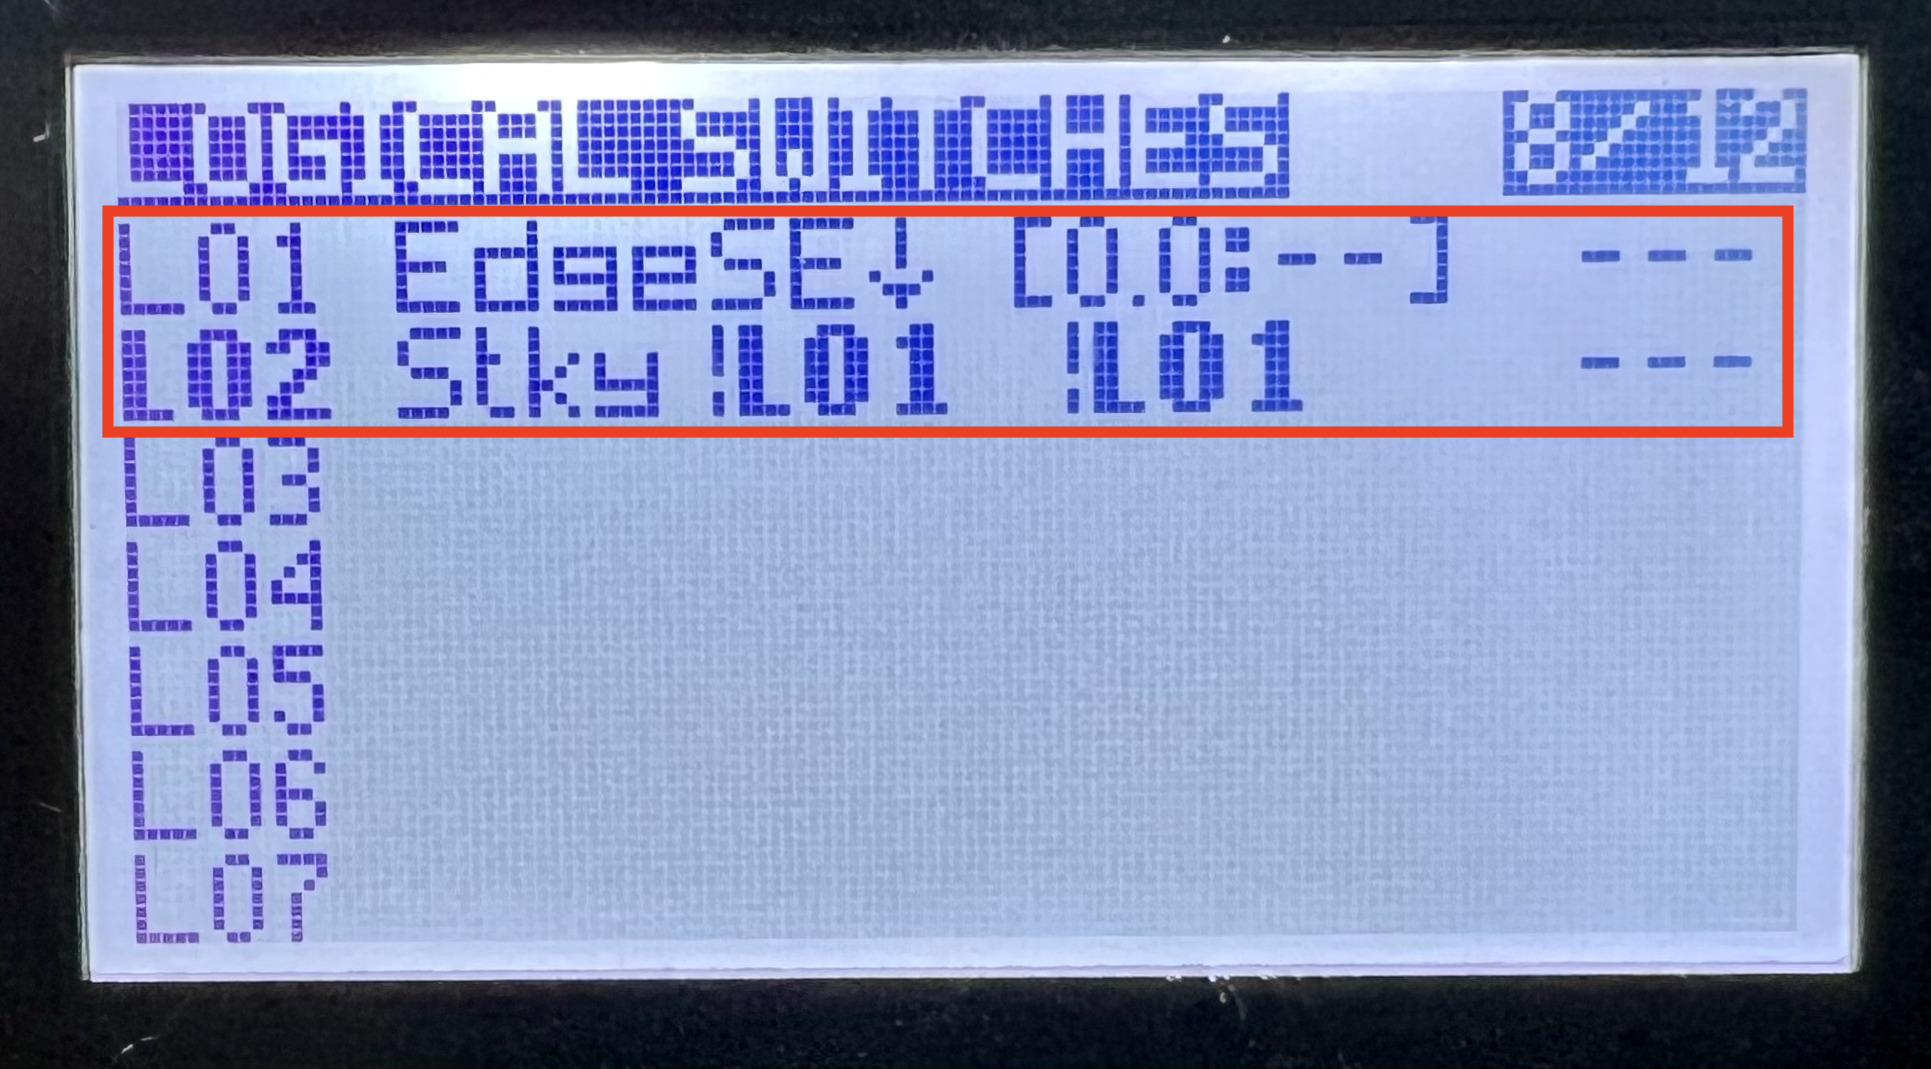
Next up is to add a “Sticky” entry in the next available slot. (in this example, L02), with the start and end triggers being the “Edge” entry position (e.g. L01). The important settings here are highlighted below. The “Func” must be set to “Stky” (Sticky), and the “V1” and “V2” flip-flop signals assigned to the logical “Edge” switch you’ve just set up. In this example, it’s L01:

We’re all done for the logical switches. If you return to the logical switches menu, the two newly created entries will be shown in the summary menu. As highlighted below, in L01 we have the “Edge” logical switch, and L02 the “Sticky” logical switch.
Next up is configuring an active mixer channel to send the “Sticky” flip-flop data in L02 to the flight controller. Navigate to the “Mixes” menu screen and choose a channel that is empty. In this case, it’s channel CH9:

Normally the first 8 are active, after that, it depends on your RX module capabilities (see box below). Your mileage on empty slots will vary – I mapped all my switches (see X-Lite Pro Switch Configuration), and I needed to extend my TBS Tracer active channels from 8 to 12 channels. You can do this via the TBS Tracer configuration setting.
An active channel is usually one of 8, 12 or 16 that are available to send data from the radio to the flight controller. The first four are usually thrust, pitch, roll and yaw, and then the next four are usually user configured switches (arm, buzzer, etc). Extending the active channels depends on the capabilities of your RX module. e.g. For TBS Tracer, 8 is the normal and 12 the maximum, with a penalty of sampling latency on the 5th – 12th channel if you wish to extend
So, on the next empty slot, assign a new mixer. The mix name is optional, but is a good reminder for what it was set up for (I chose a rather cryptic BL = button left). The key setting is the “Source” – assign this to the “Sticky” logical switch that was set up earlier – in this example, L02:

One thing to note is that if you are just using a physical toggle switch, you would choose a “Source” of a physical 2/3-way switch rather than the sticky logical switch. Returning to the menu, the new channel is now added to the mixes:

If you press the button, you can see the button enabling. If you press the button again, you see it disabling. This shows that the CH9 mixes is working correctly:

That’s it on the radio. Next up is configuring Betaflight and the drone.
Setting up the flight controller
This section covers linking the channel to flipping the OSD profile, and setting up multiple OSD profiles. Connect the drone to Betaflight and enable “expert mode” (highlighted in the red box below). This will make the “adjustments” tab visible, which we’ll use later on:

Now check the radio mixer channel signal is being received by the flight controller. Go to the “Receiver” tab, and monitor the receiver channels. Press the button back and forth, and if all goes well, watch the AUX number flip back and forth. Take a note of the AUX number for use later on:

If the channel is not active, check the number of channels that the RX module can handle. Above, AUX 5 is the 9th channel, and I had to extend TBS Tracer settings on the radio to send data on 12 channels rather than the default 8. Different RX modules support different numbers of channels, with 8 being the standard.
The “Adjustments” tab is used for adhoc inflight changes (rather than the “Modes” tab). So, switch to this tab (if you can’t see it, enable expert mode) and using the AUX number noted previously (in this case AUX 5), configure two positions, dragging the sliders to 1/3 to the left for the first OSD Profile position, and 1/3 to the right for the third OSD Profile position, as shown below. Pushing the button on the radio will show the range the sliders need to be in:

Now it’s time to configure the OSD Profiles, remembering to choose OSD Profile 1 and 3. My first profile contains metrics I generally find useful for flying, and then the 3rd profile a cut down version. For you, it may be engine metrics, or PID data, etc:

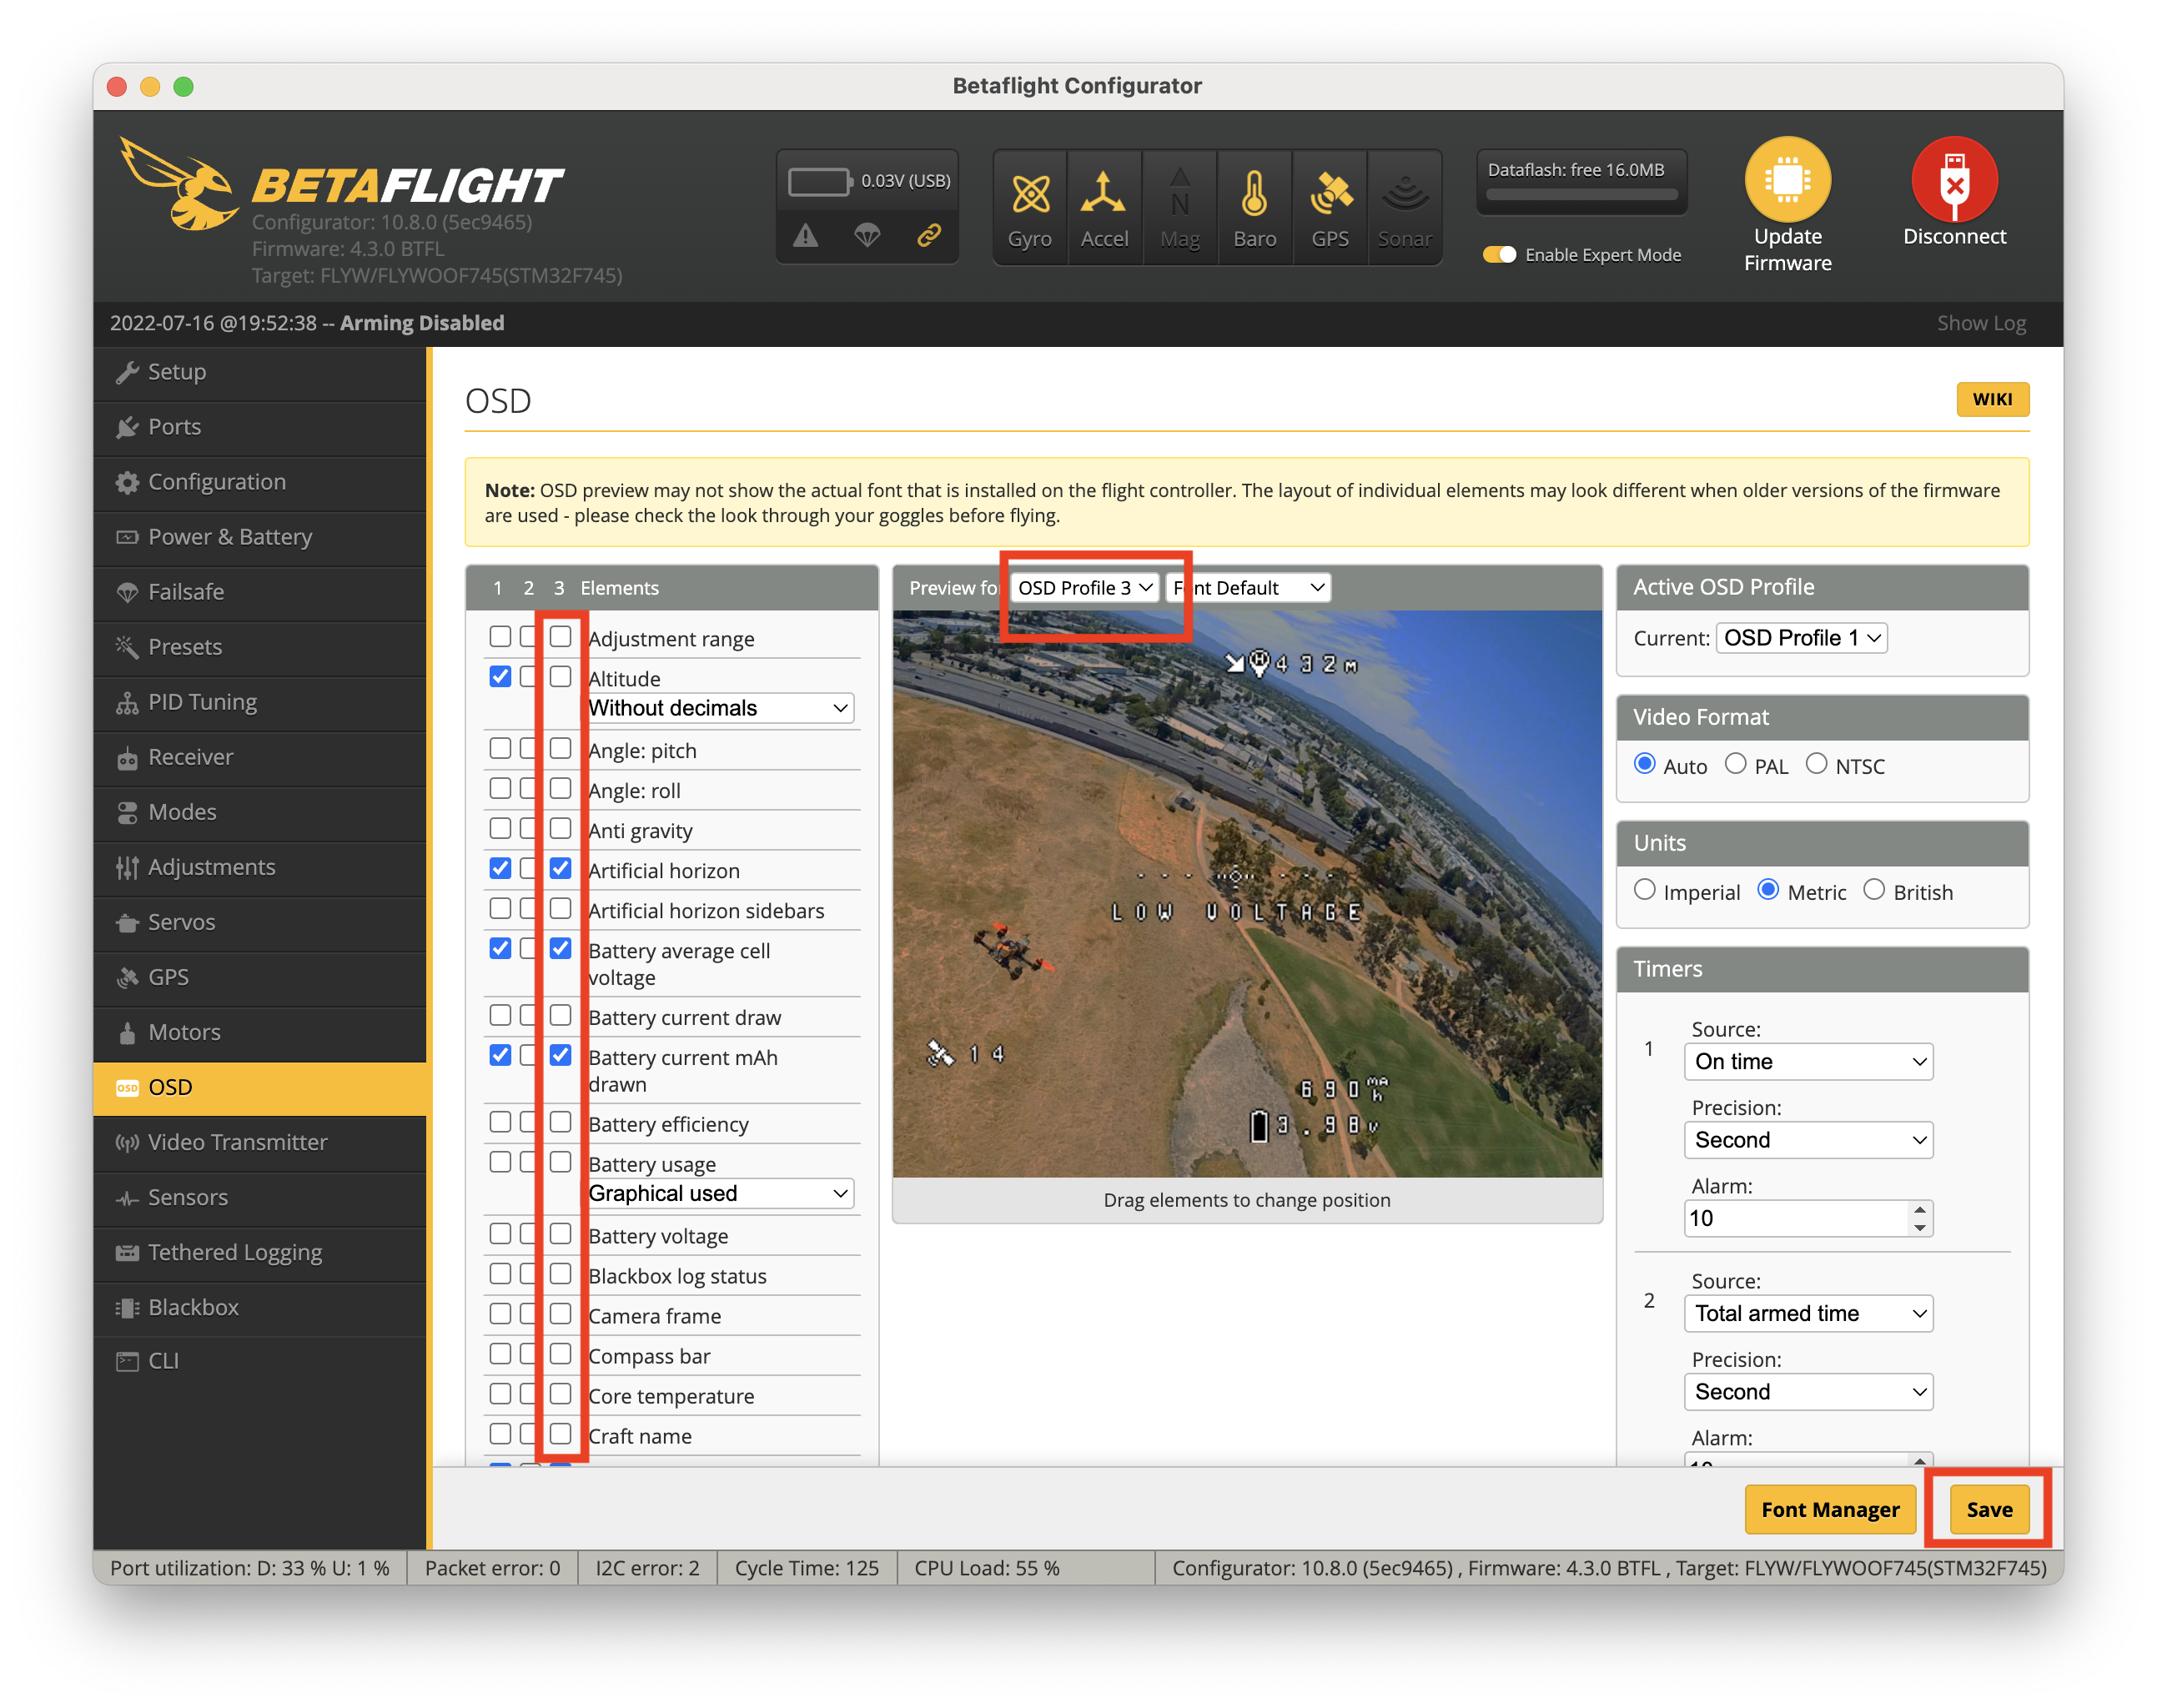
And that’s it! Don’t forget to save. You can perform a proper test by powering up the quad with a battery (no props of course) and viewing the OSD through FPV goggles or such. Pressing the button will show the OSD display flip between OSD Profile 1 and 3.