Operational: October 2020 – March 2023 (retired)
The design brief for this drone is a drone that is reasonably light-weight, quiet and fun for practising with, yet still supporting the XT60 4S batteries. To keep the weight down, I’ll be using a Runcam Split S 4 for 4K video footage, instead of the usual GoPro.
The upside of the Runcam Split S is of course reduction of weight, but the major downside is the FPV latency, which on average is 38 ms vs 5 ms of my usual go-to Foxeer Monster Mini.
I retired this drone when I moved to a digital VTX system. In practice, I did not use this drone as much as I expected, rarely taking it out. The video quality was mediocre, and the overall build too small to fit a GPS for tracking and it was blown around by the wind where a 5” wouldn’t be. It didn’t fit under the 250g weight limit, so needed registering. It looked pretty awesome however, and was a very good exercise in micro-component soldering.

Weight-wise, the drone measures out as follows:
- 165 grams (with props, but no battery or battery strap)
- 270 grams (with addition of battery and battery strap)
It doesn’t come in under the 250 gram fully loaded build that enables drone non-registration in Switzerland (see New Drone Regulations coming to Switzerland in January 2021).
Specifications
Components used in the build are as follows:-
| Component | Description |
|---|---|
| Frame | Armattan Gecko 3″ Freestyle Frame |
| Flight Controller | Matek Systems F722-Mini Flight Controller |
| ESCs | Holybro Tekko32 F3 45A Mini 4-in-1 ESC |
| Motors | XNOVA 1407 3500Kv |
| FPV VTX | Matek Mini-VTX 5.8GHz 25-800mW VTX |
| FPV Camera | Runcam Split 4 |
| Receiver | FrSky R-XSR SBUS 2.4GHz Micro Receiver |
| Extras | Small buzzer, no GPS |
Construction
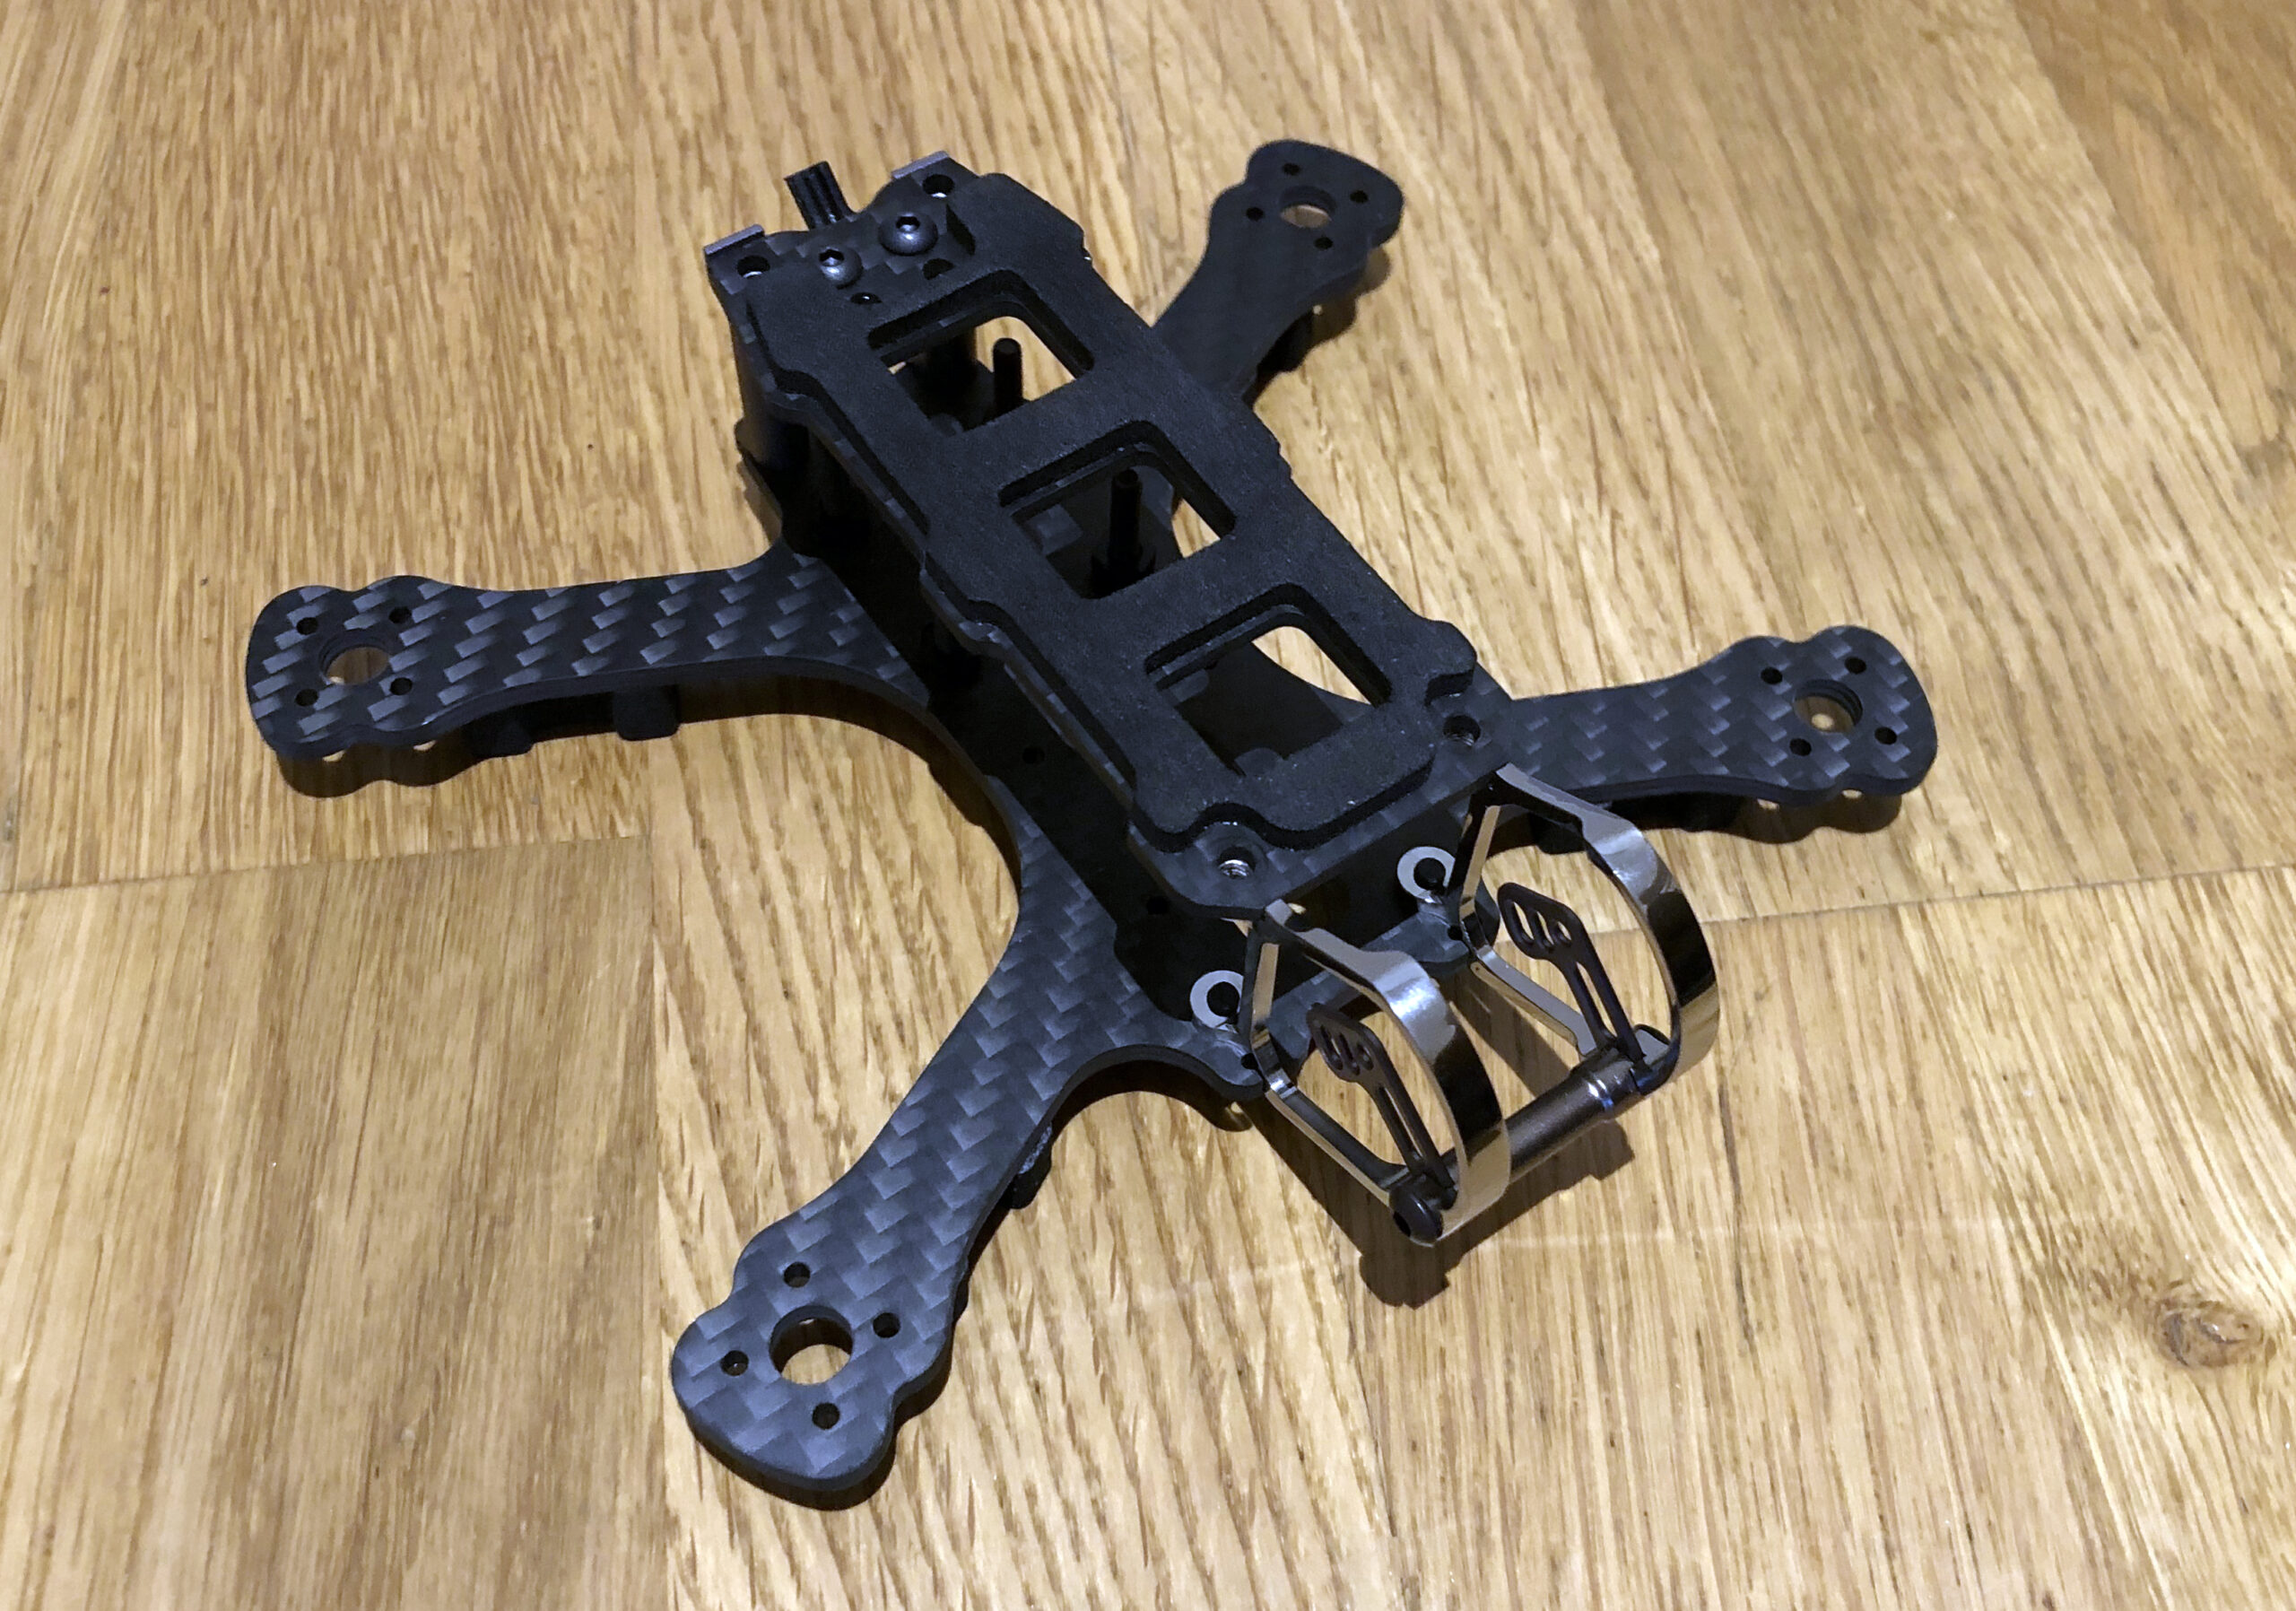
I chose to use the Armattan Gecko frame, as it supports two 20 x 20 mm mounting positions and I’ve had good experience with their build quality on my Gold Paw and Cragon builds. This is the basic frame, with the ability to mount two 20x20mm stacks inside the frame:
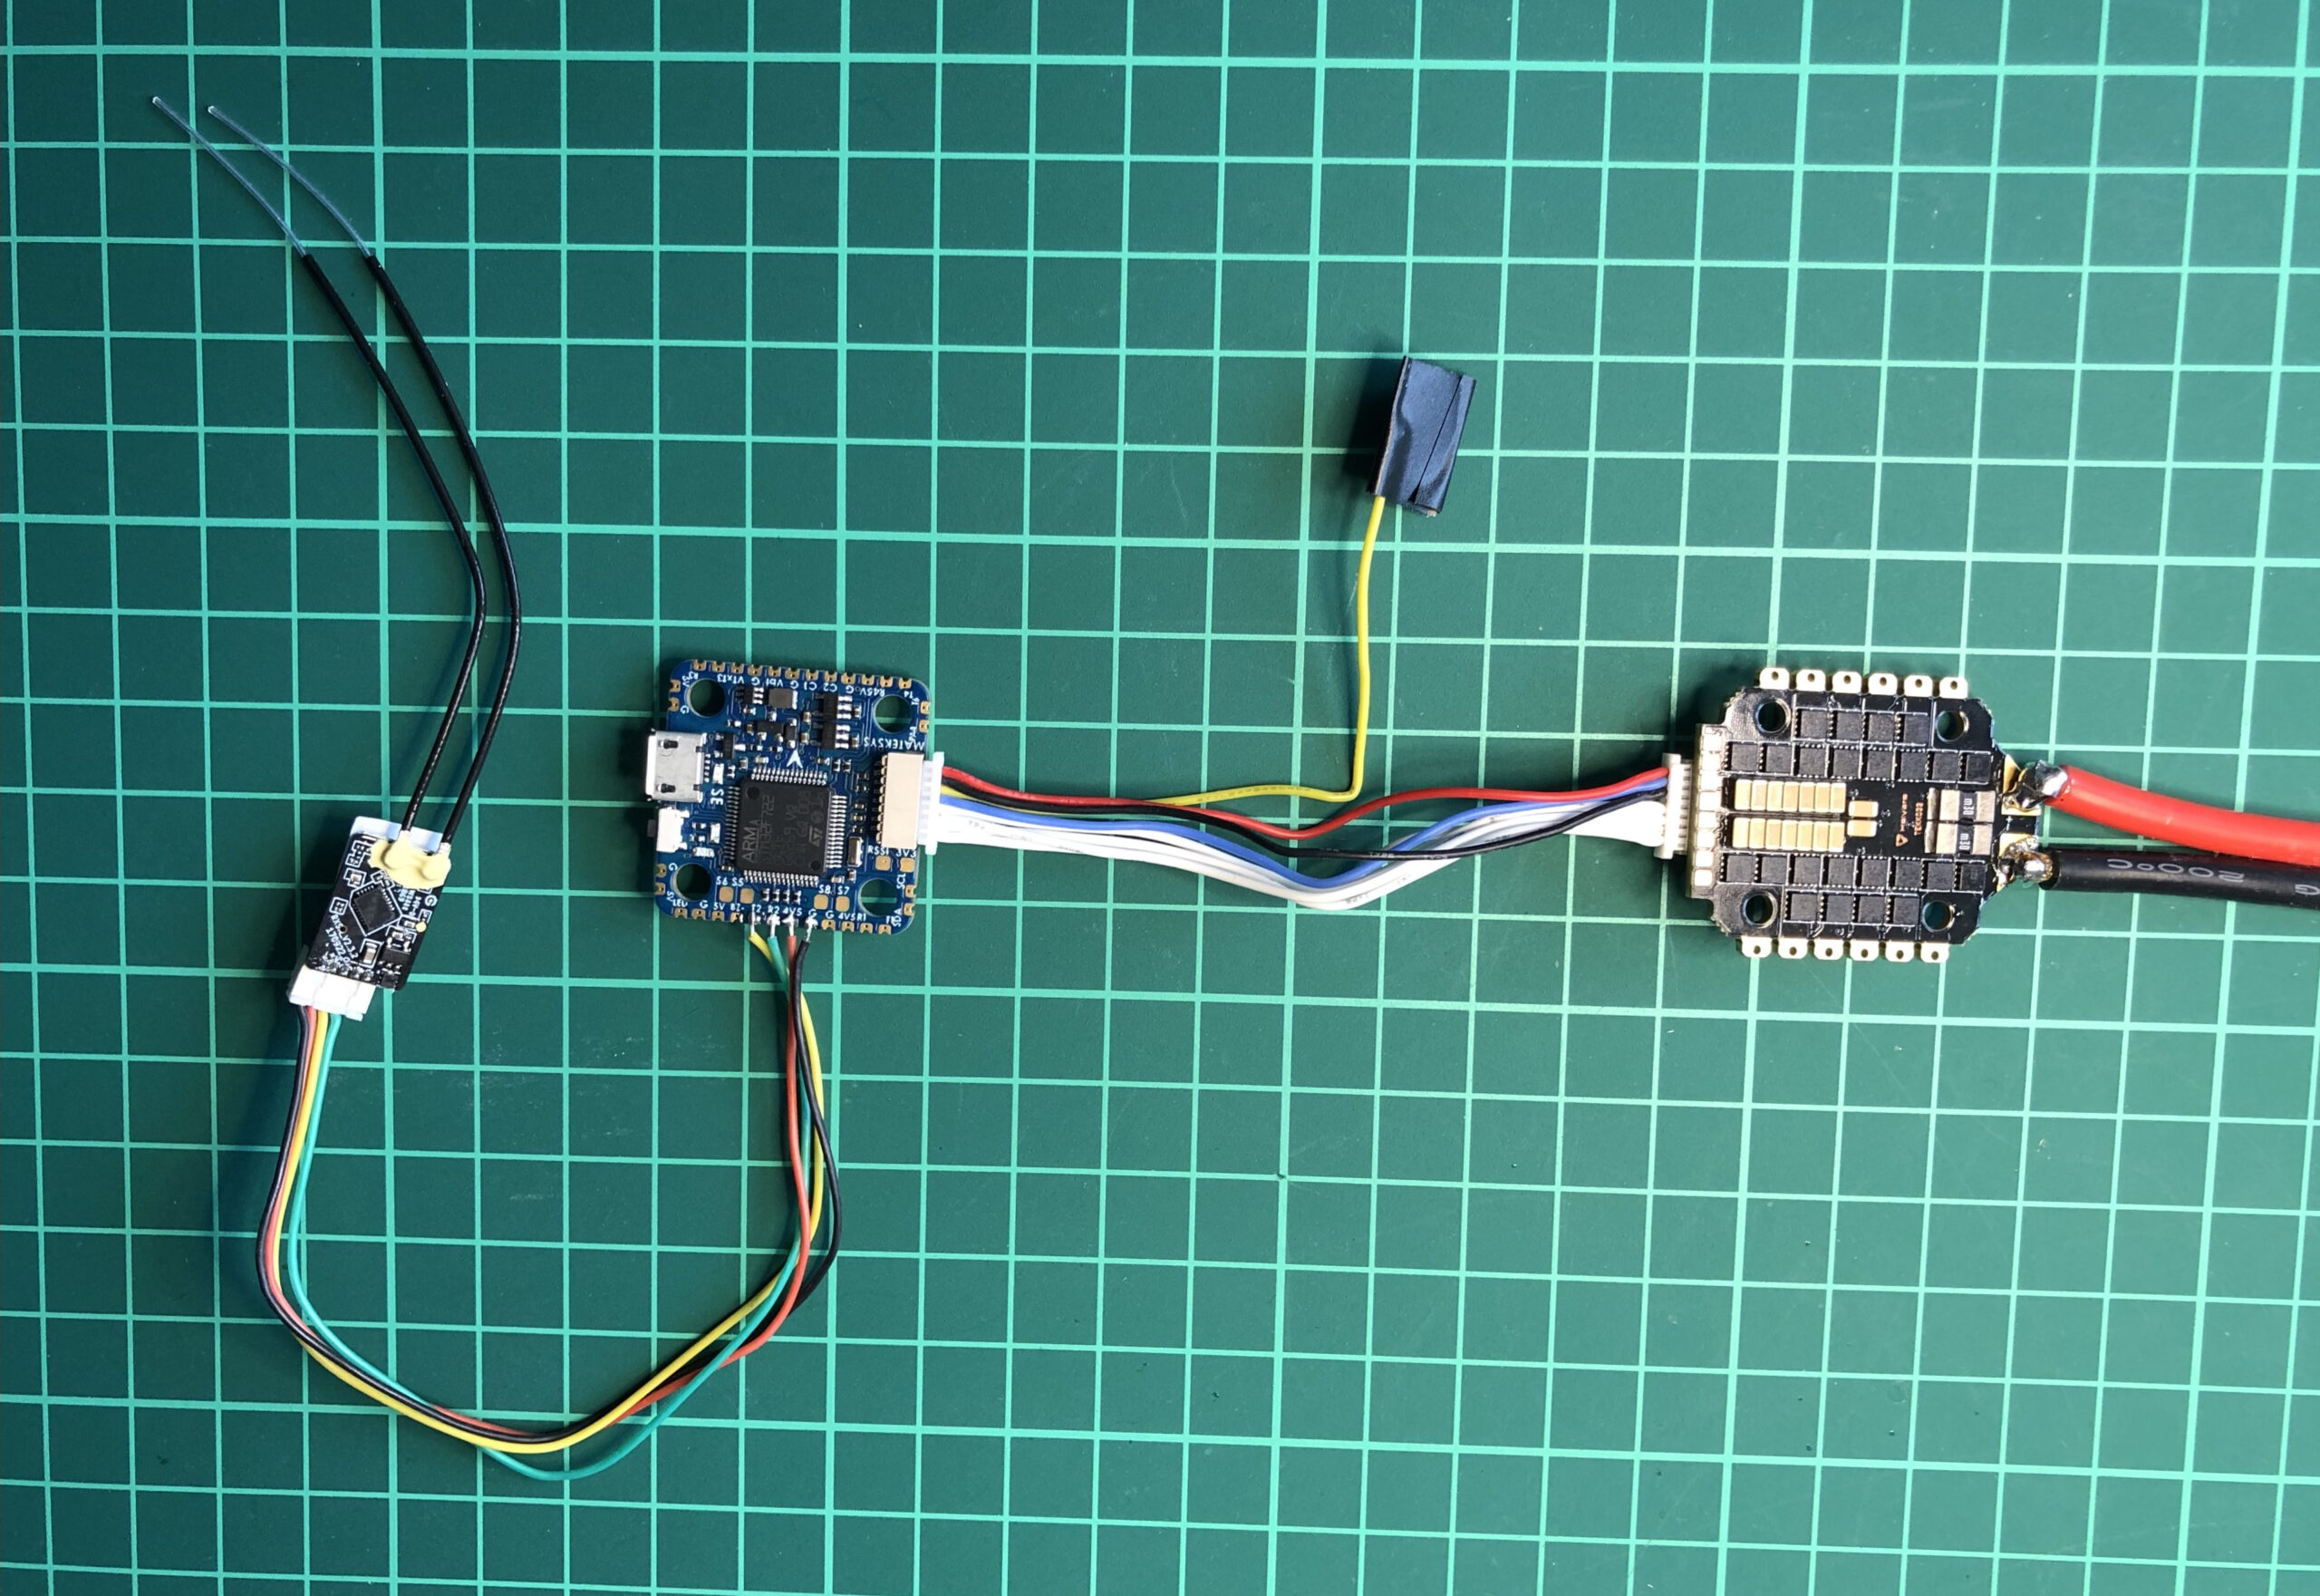
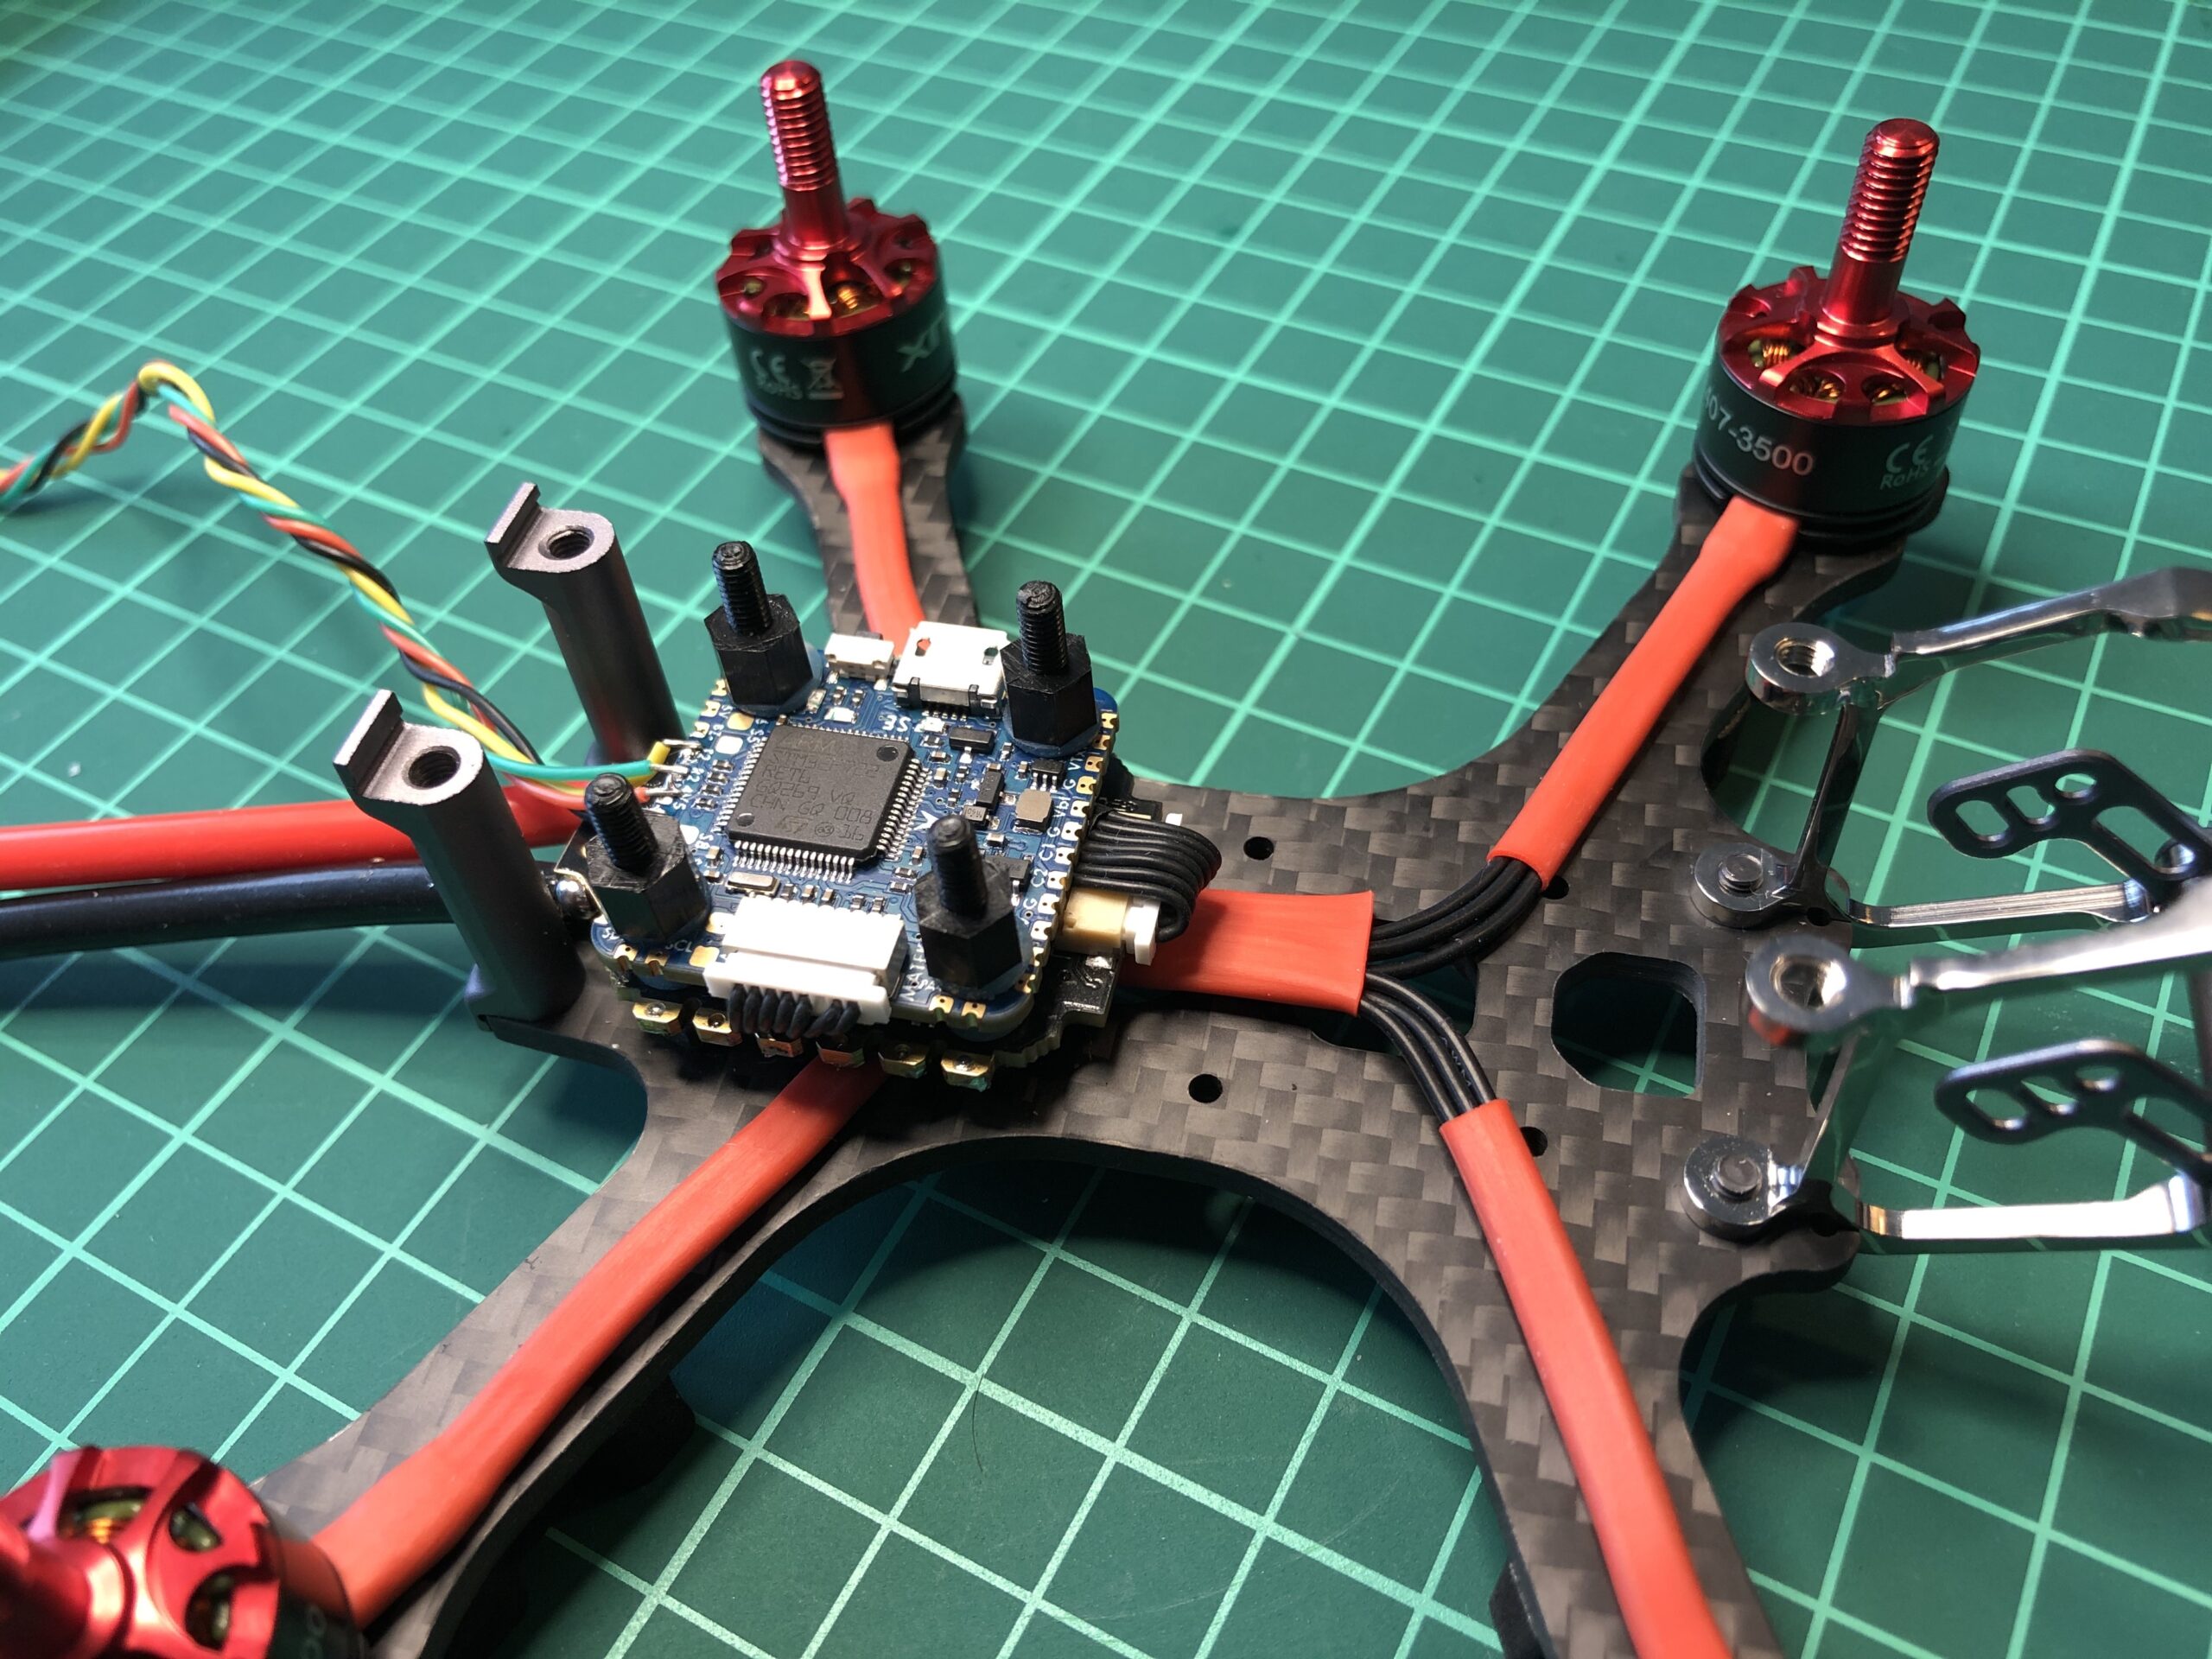
When building a drone I check the core components will function together outside of the frame, and only at a later stage adjust the wire layout and lengths in relations to how everything will sit on the frame. Below – left to right – the receiver (FrSky R-XSR), the flight controller (Matek F722-minise) and the 4-in-1 ESC (Holybro Tekko32). Missing electronics are the VTX (Matek mini VTX), the FPV camera (Runcam Split 4) and the motors:
A dry-run of fitting the motors into the frame, with vague cabling locations …
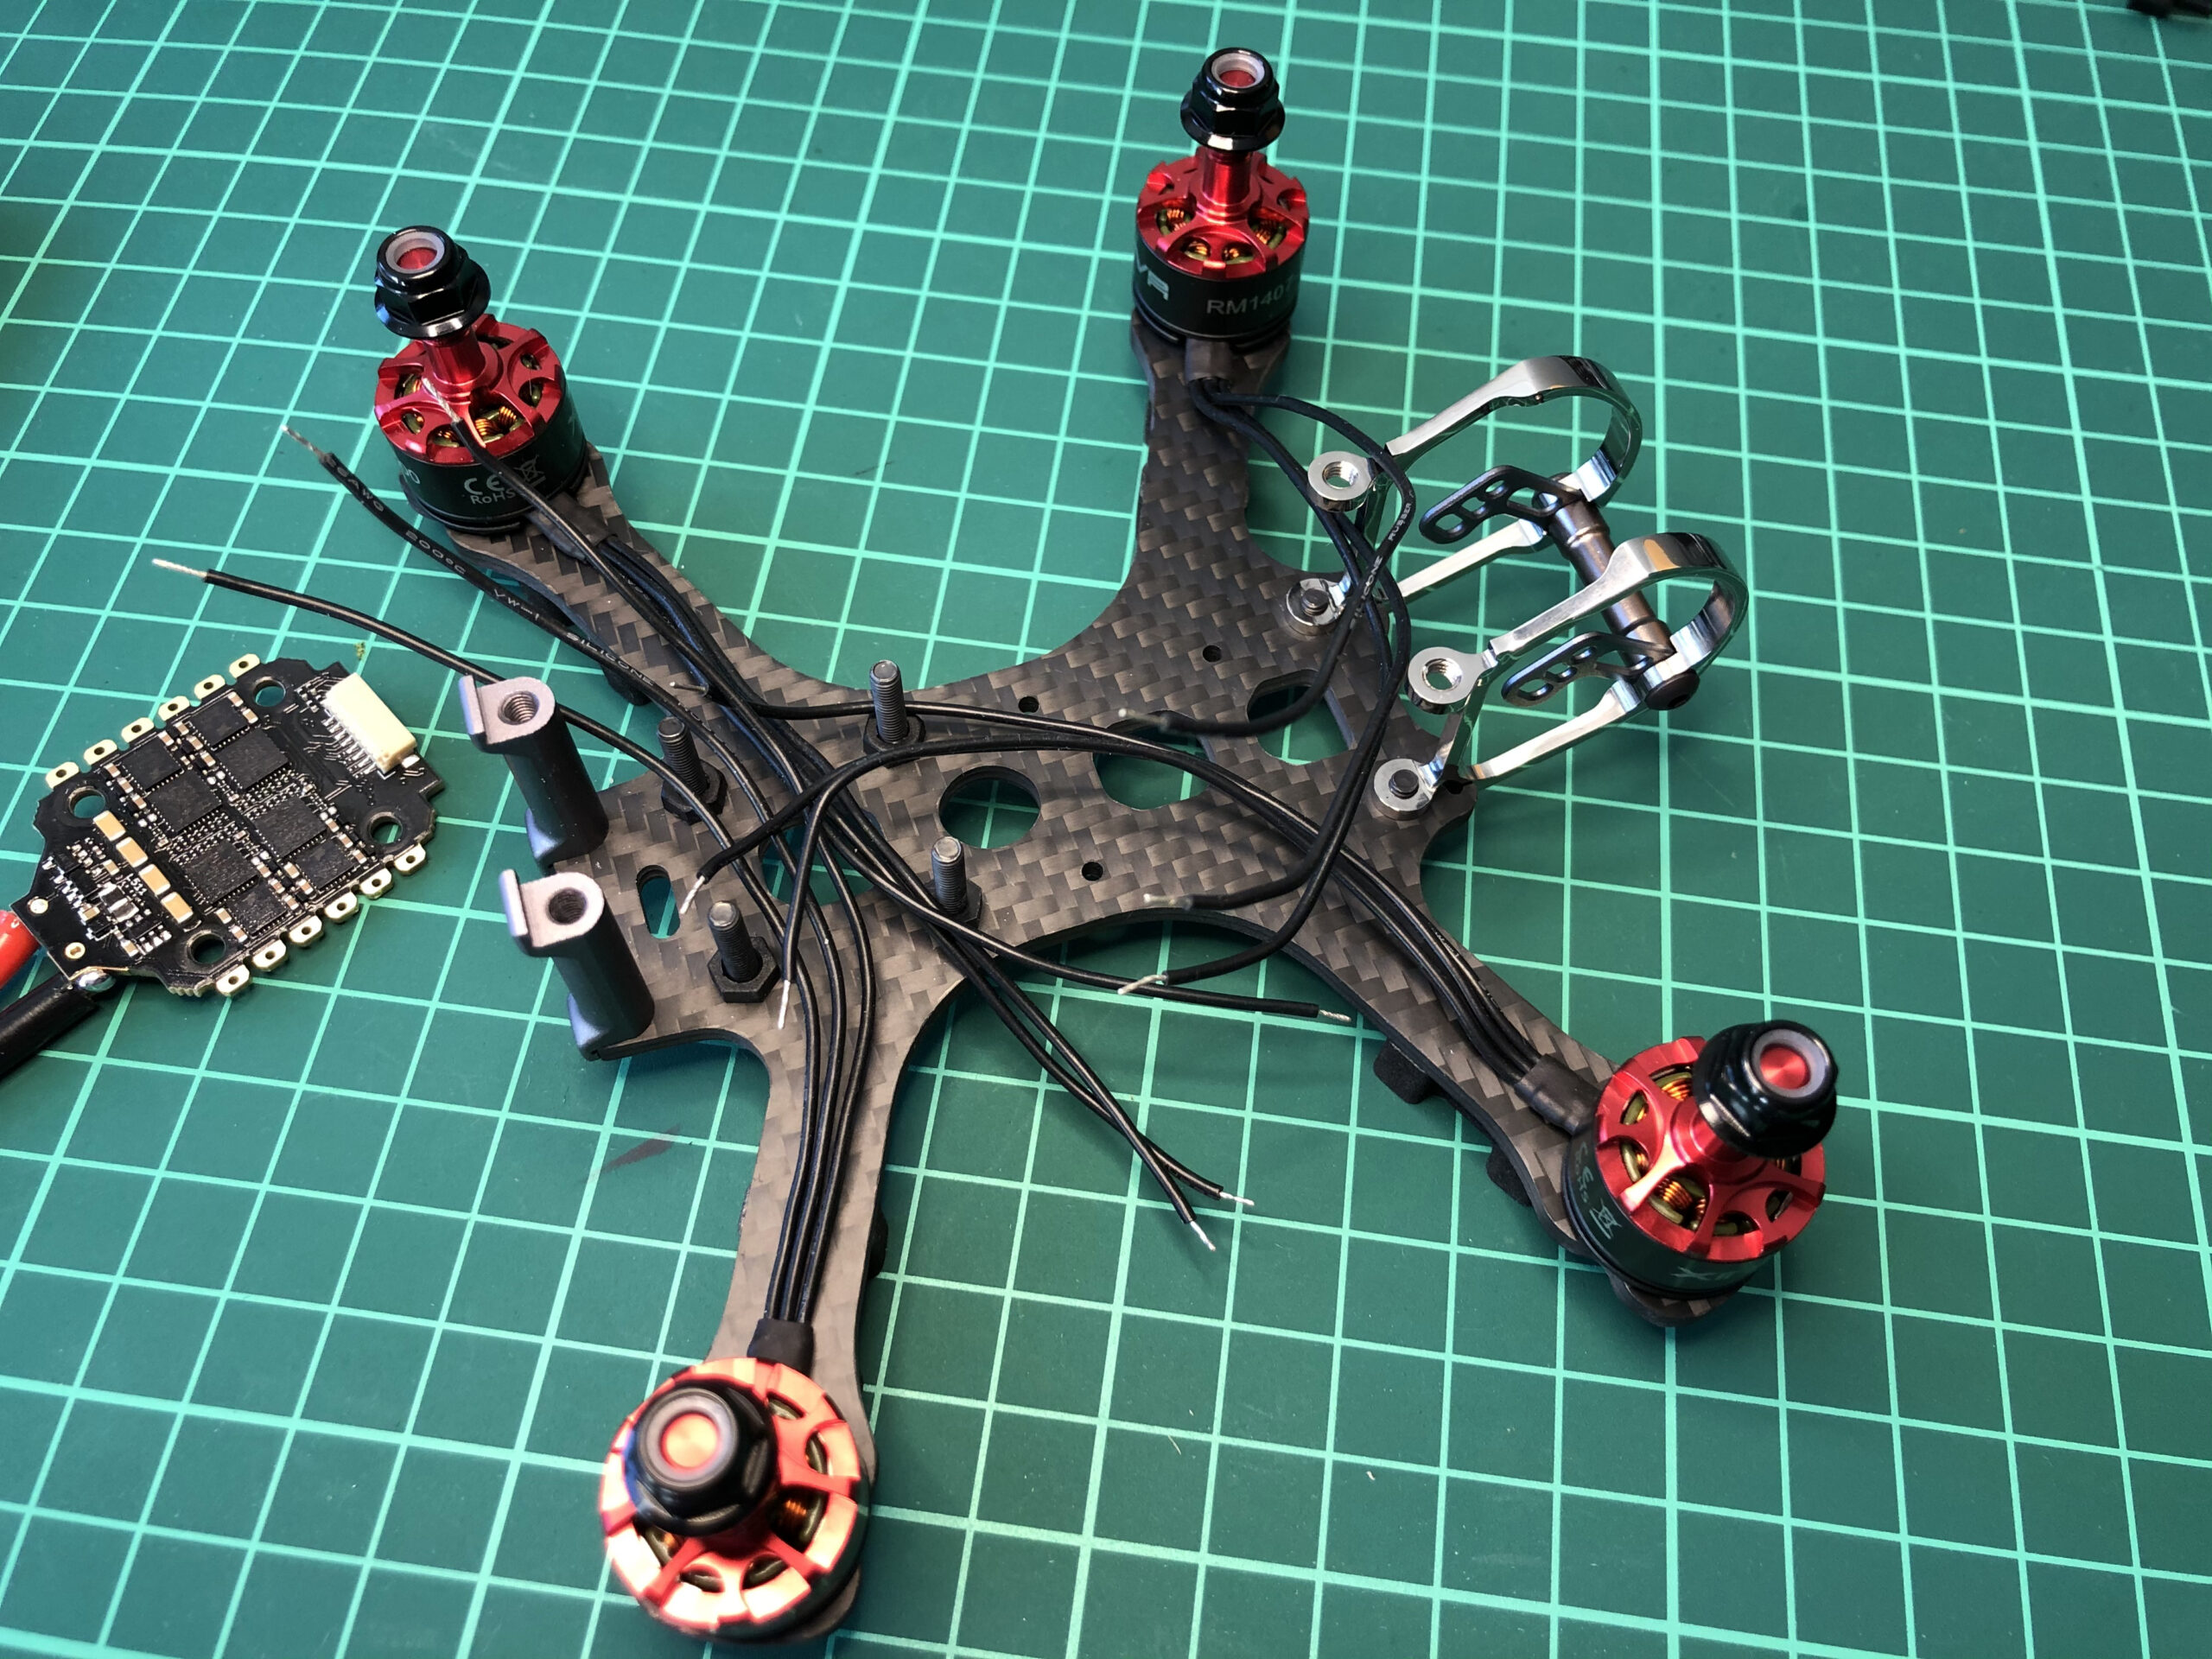
Next up, heat shrinking the motor cables to avoid loose wires, and of course, aesthetics! I’ve clipped the wires to reflect their eventual position underneath the 4-in-1 ESC board.
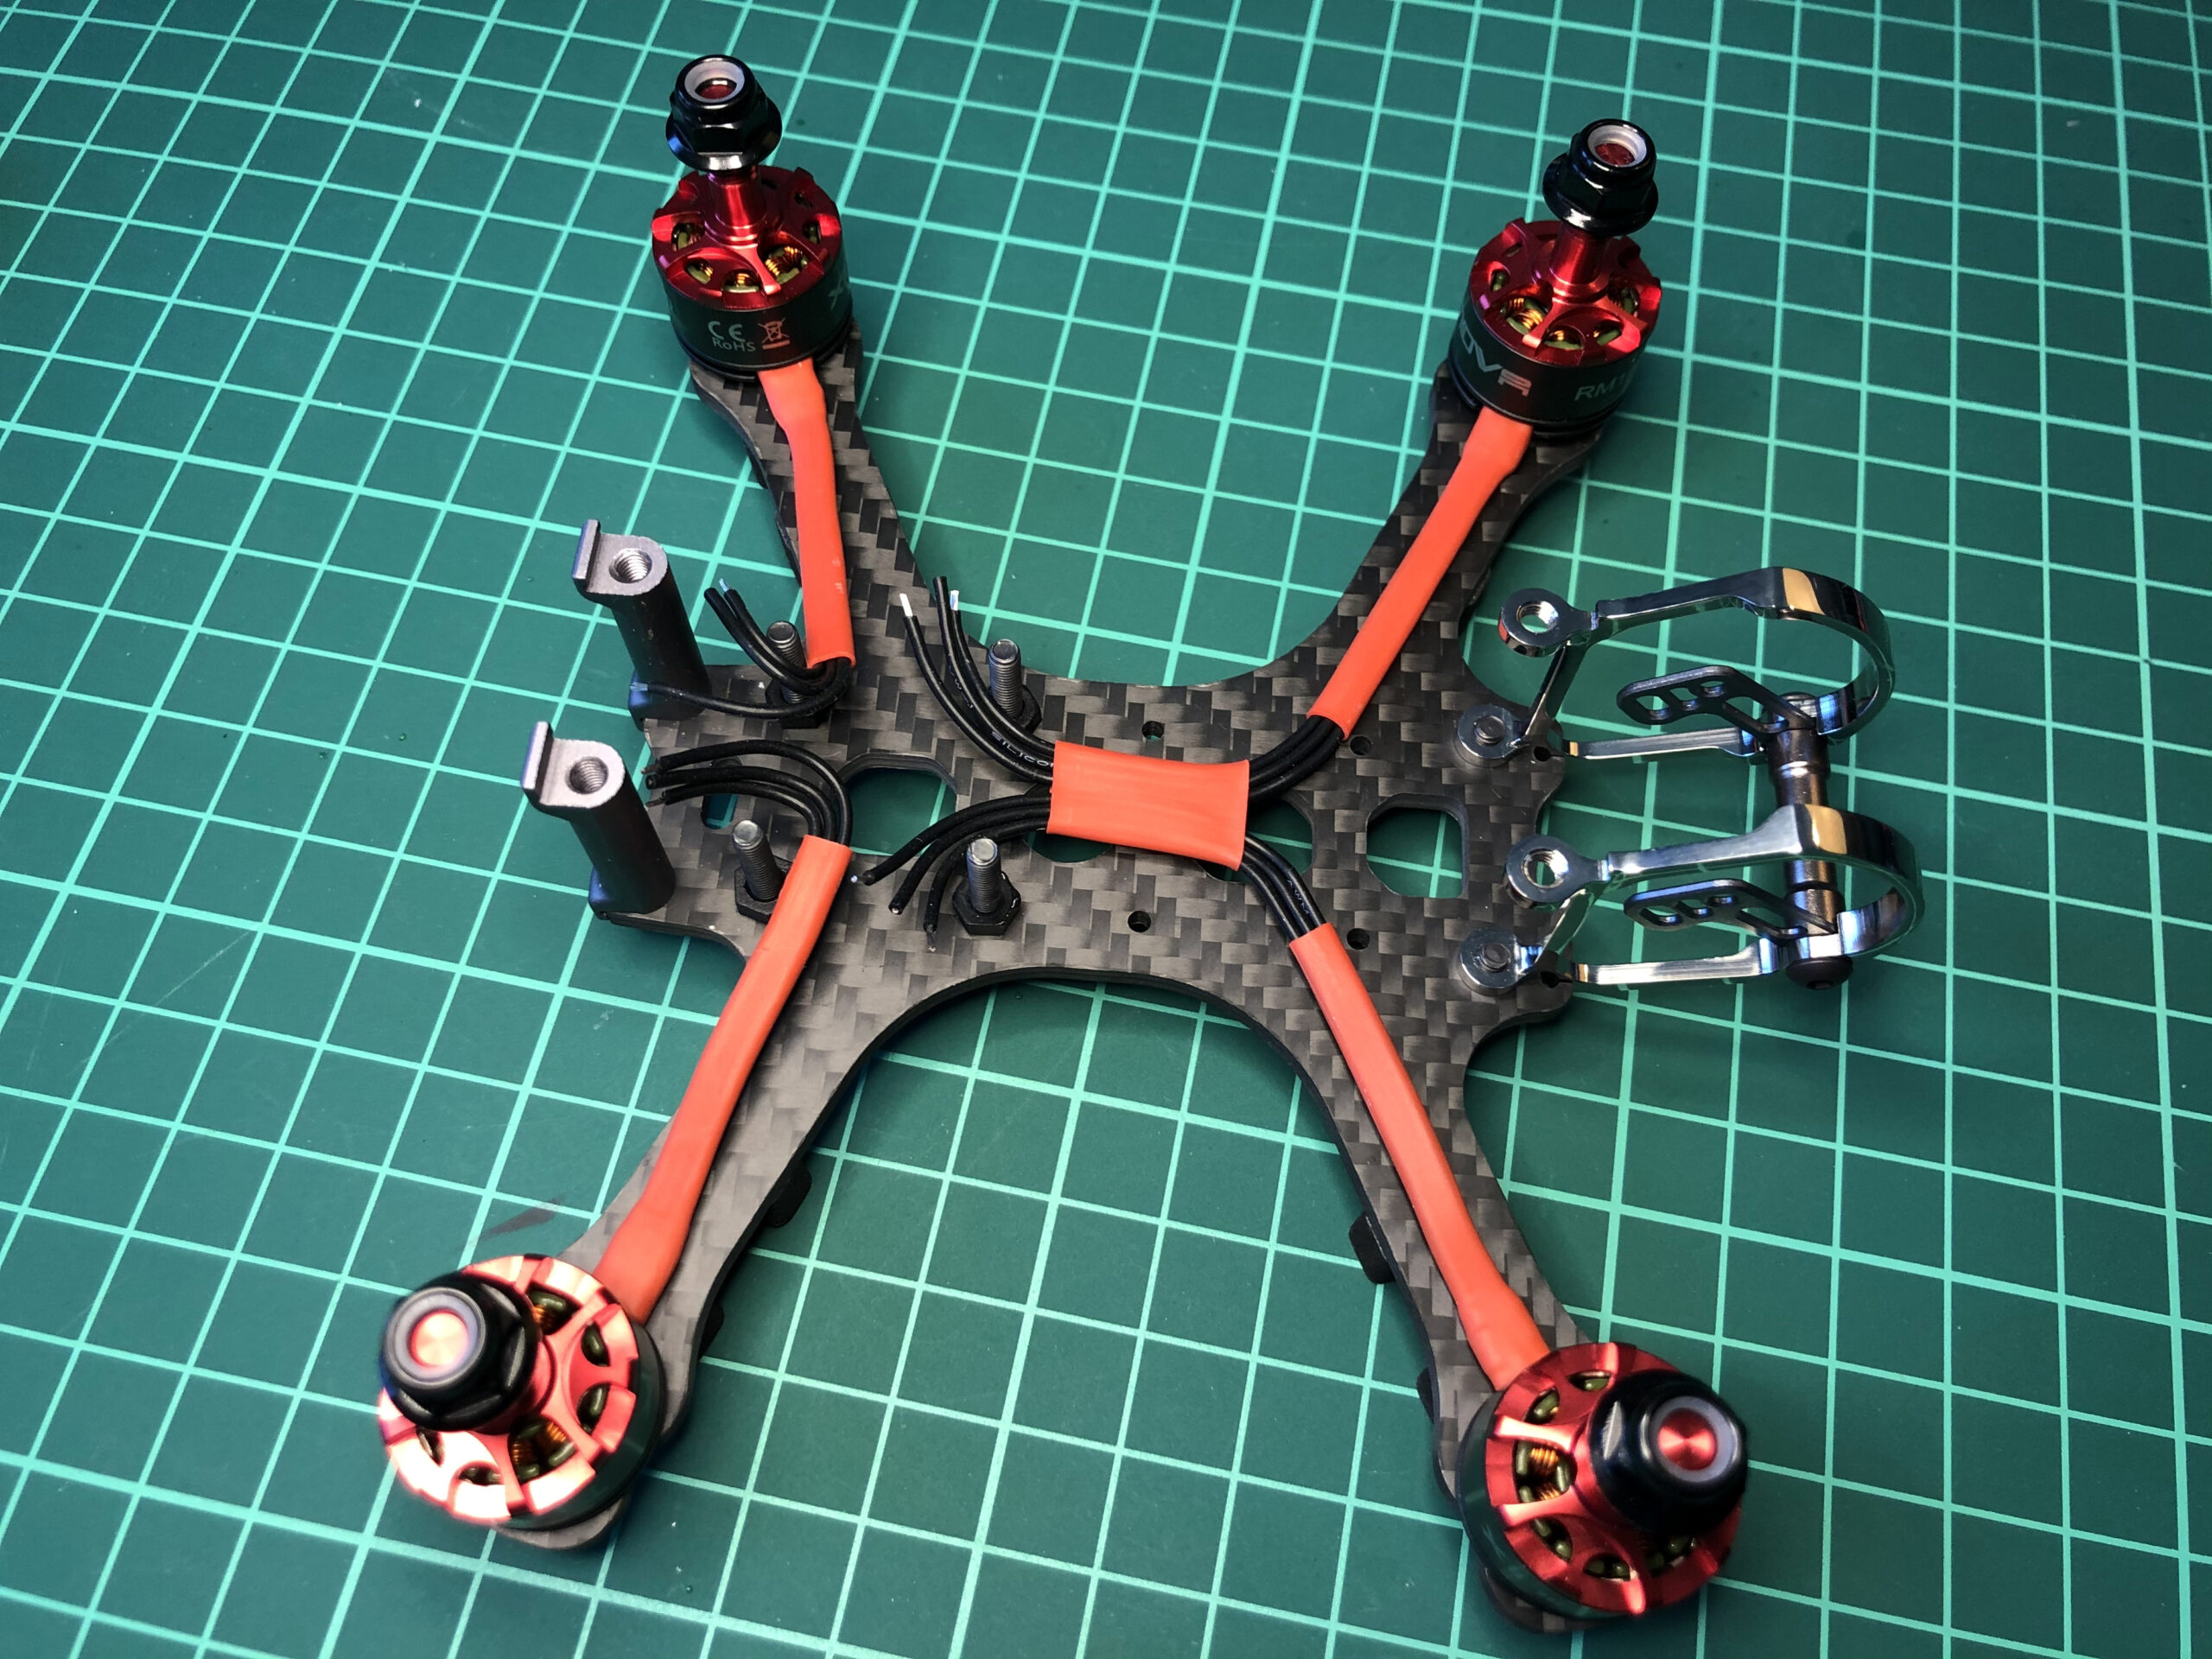
The cable routing is quite tight on a 3″ frame. To avoid wires sticking out of the sides, the cables are wired under the 4-in-1 ESC. To solder them to the underside, one needs to dismount the motors and flip the components upside down, taking care to solder on the correct sides. Later on I’ll assign the motor numbers and motor directions through software.

Et voila – reassembled and looking elegant – no ESC wiring to be seen. The ESC to FC connection will be through the white connector on the right hand side.
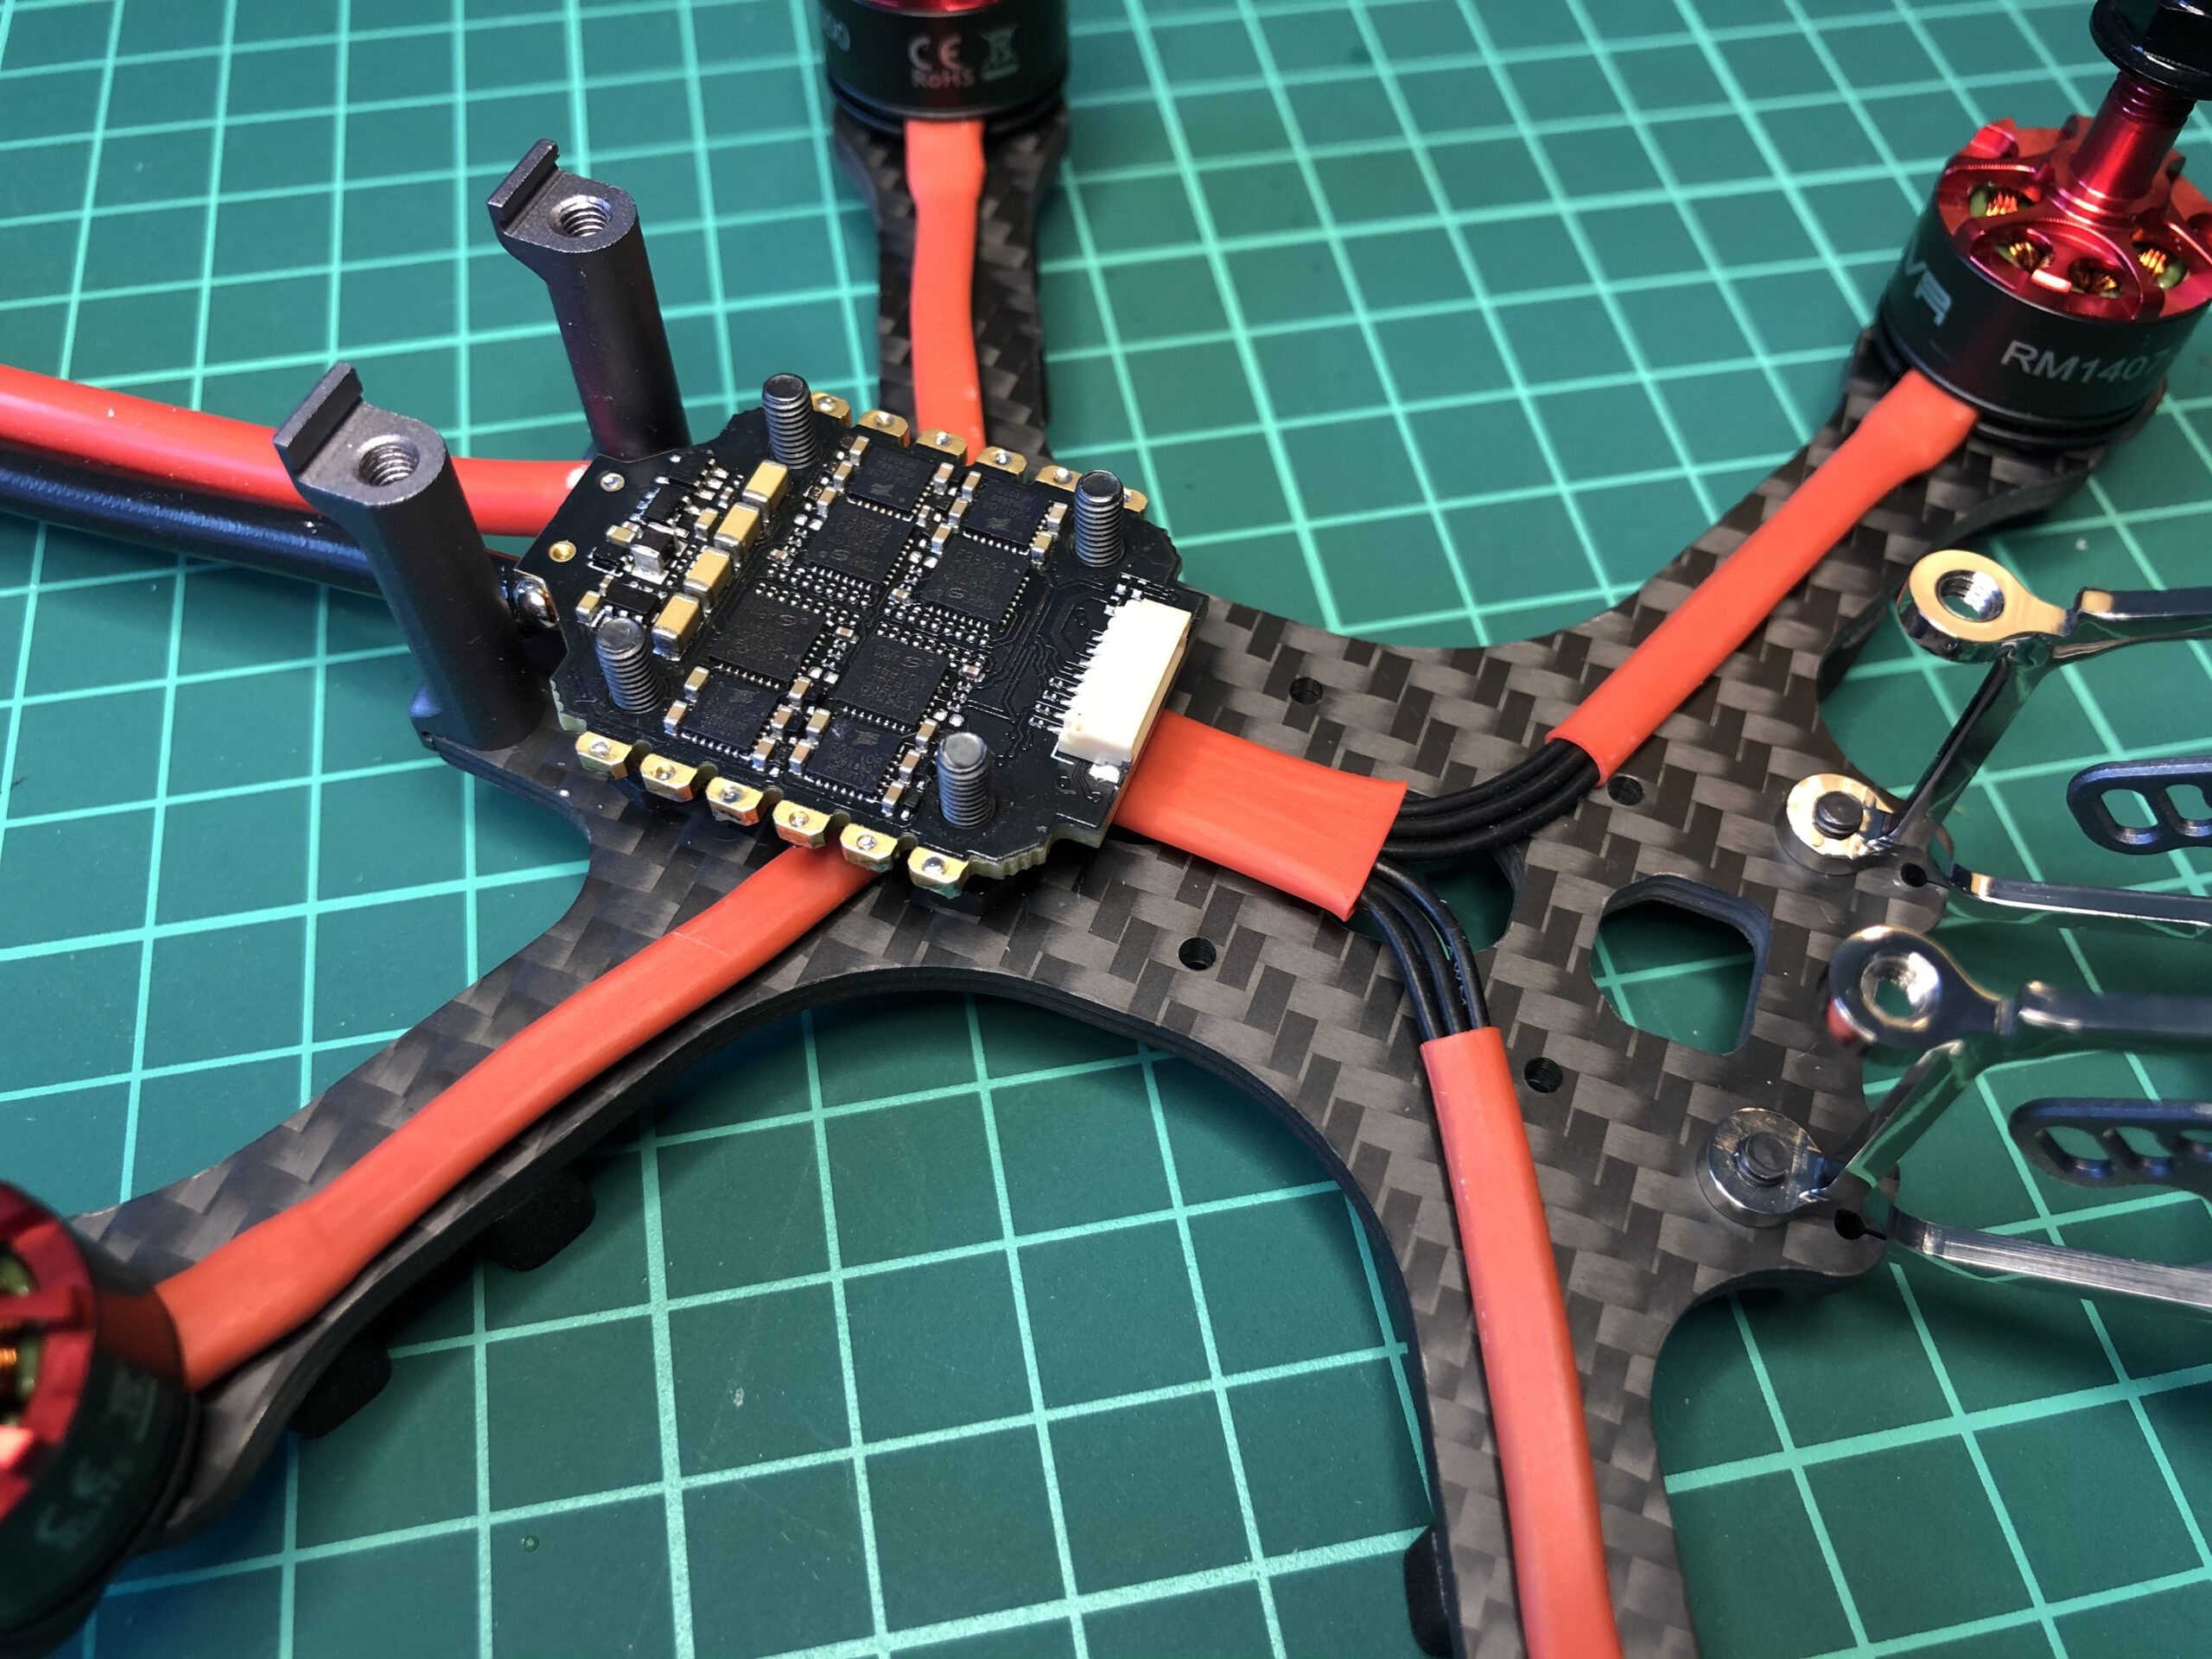
The FC is now put on top, with the connectivity cabling tucked between the ESC and the FC. The pin layout of the Matek and Holybro components differ, so a couple of wires are flipped, but this is not visible. It’s now possible to do a (prop-free) system test, fixing the motor numbering (in Betaflight), motor orientation (in blHeliSuite32) and checking all the SmartPort data is coming through.
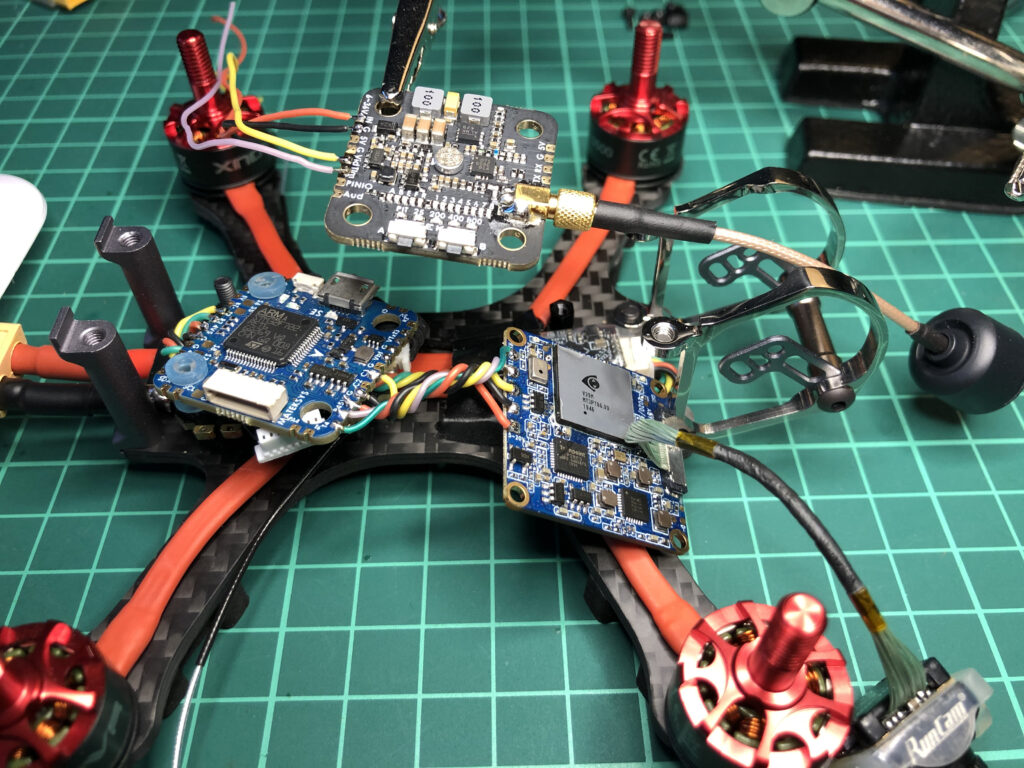
The next step is installing the Runcam.4 Split. Unfortunately it has 25.5mm width spacing (for toothpick drones) rather than the usual 20mm width spacing. Break out the 3D printer (my STL design is on Thingiverse) …

Here is a draft assembly on the drone – the R-XSR is under the Runcam board, and the wires are still too long.
The video components can now be wired to the flight controller – a fiddly job – best to use a loupe lamp, and to keep the wires reasonably short.
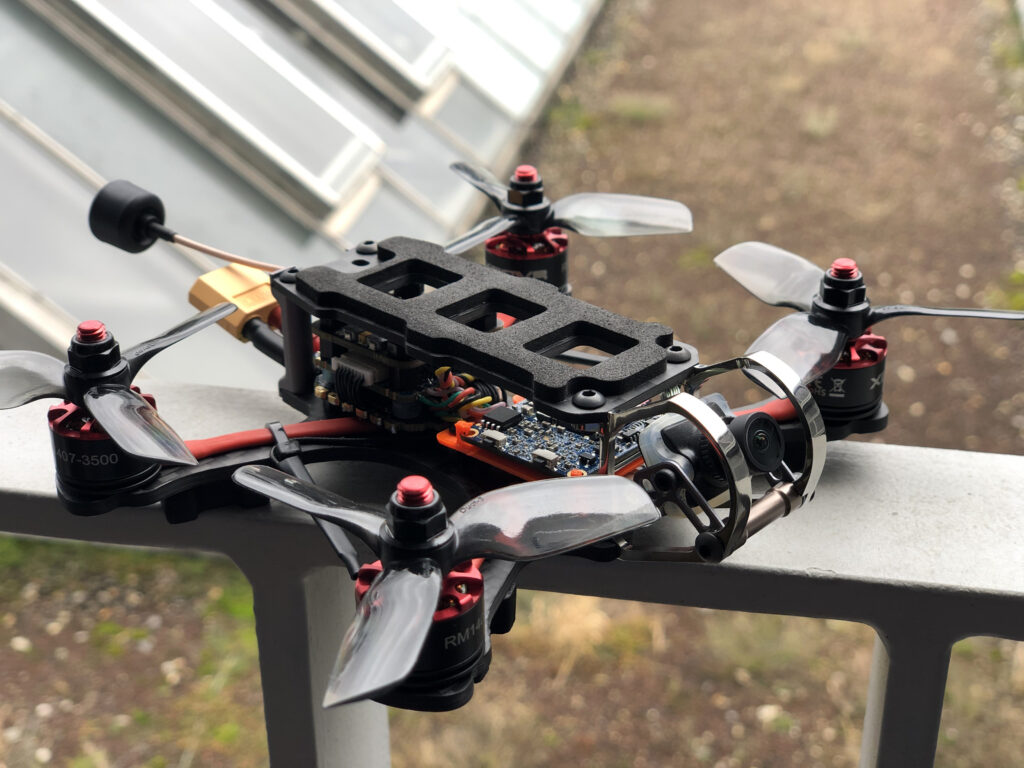
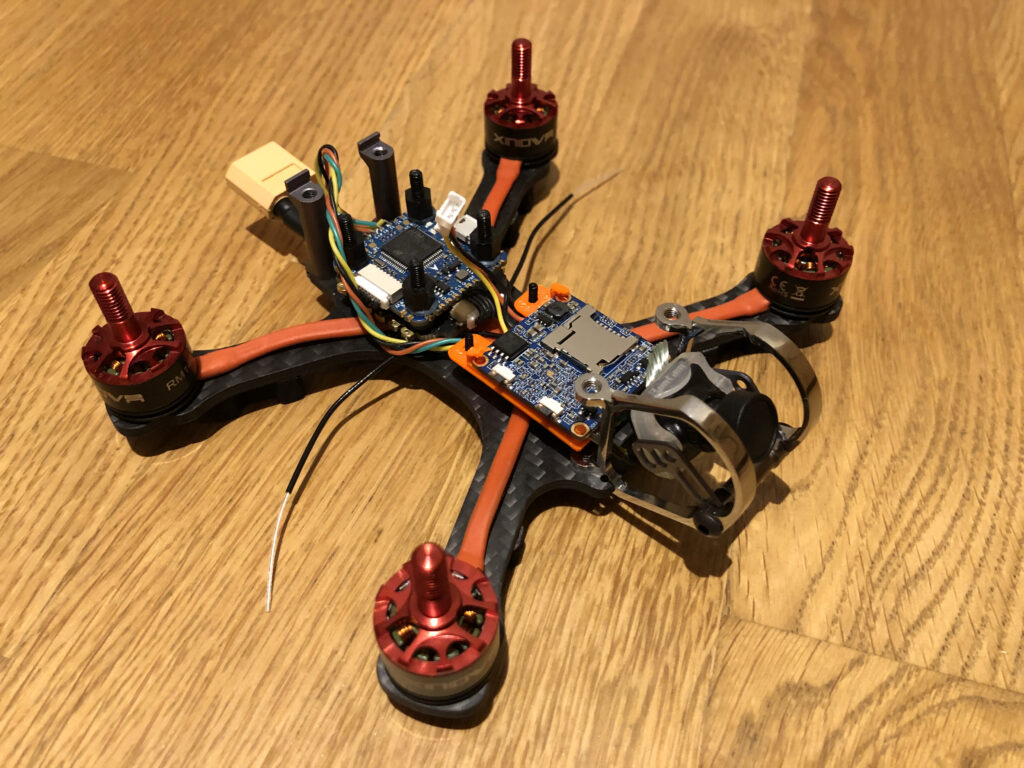
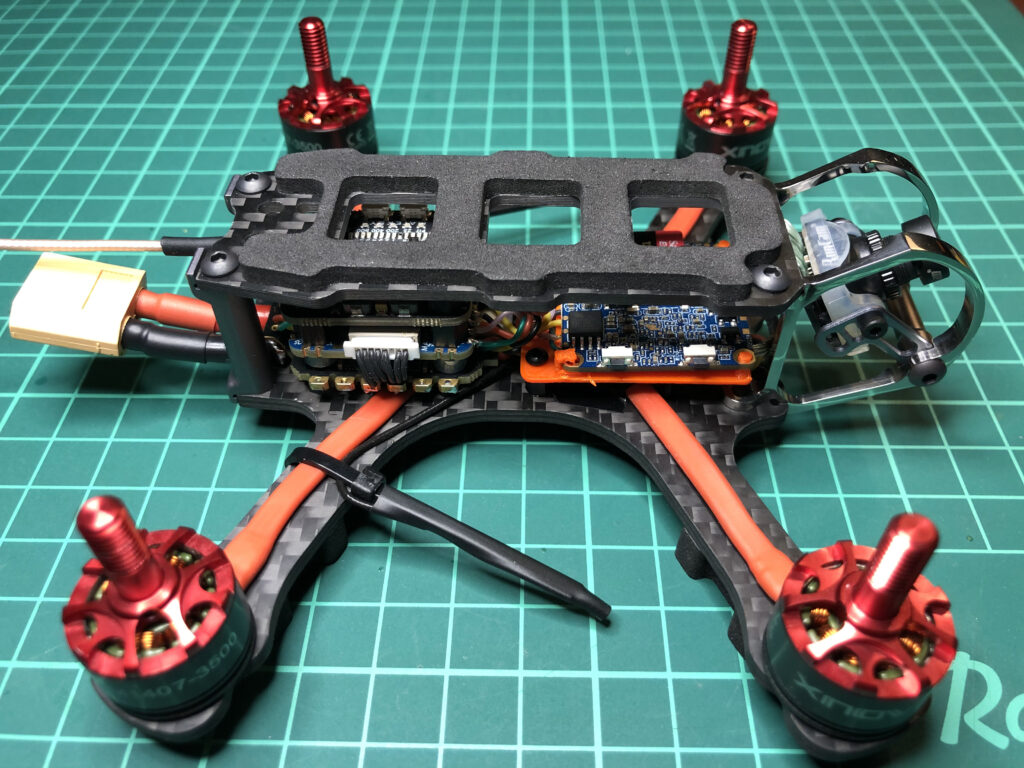
Finally, it’s assembled and ready for software configuration and testing! I’ve heat-shrinked the R-XSR wires to a zip-tie to keep them out of the way, yet in a classic V-shaped configuration.
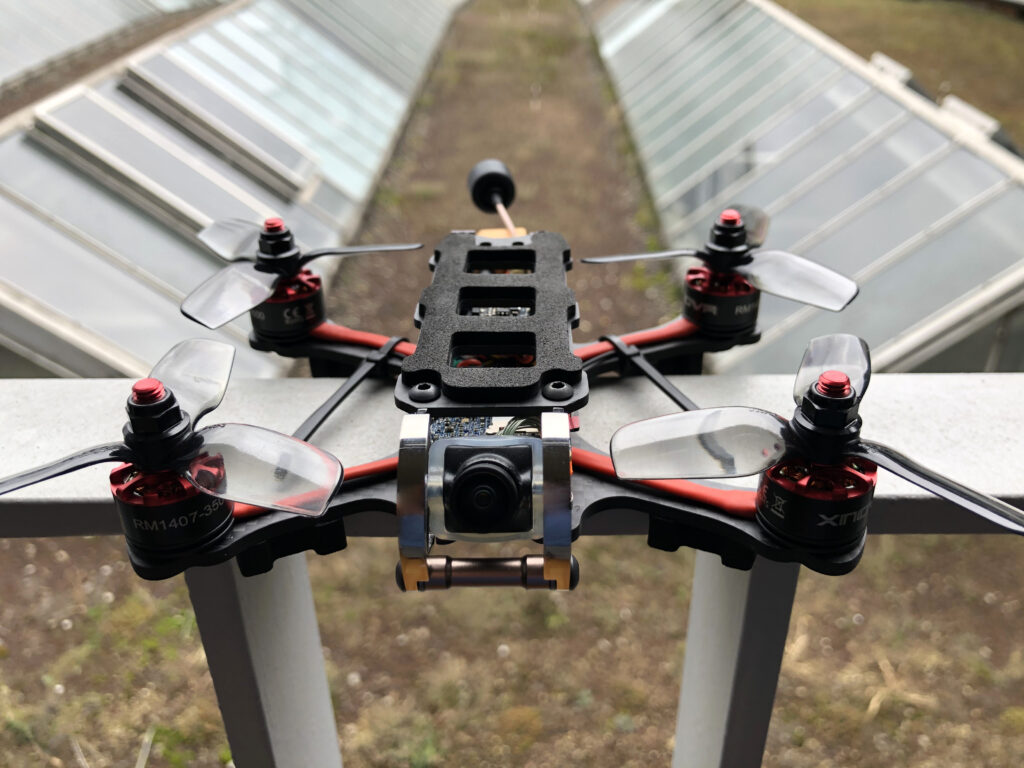
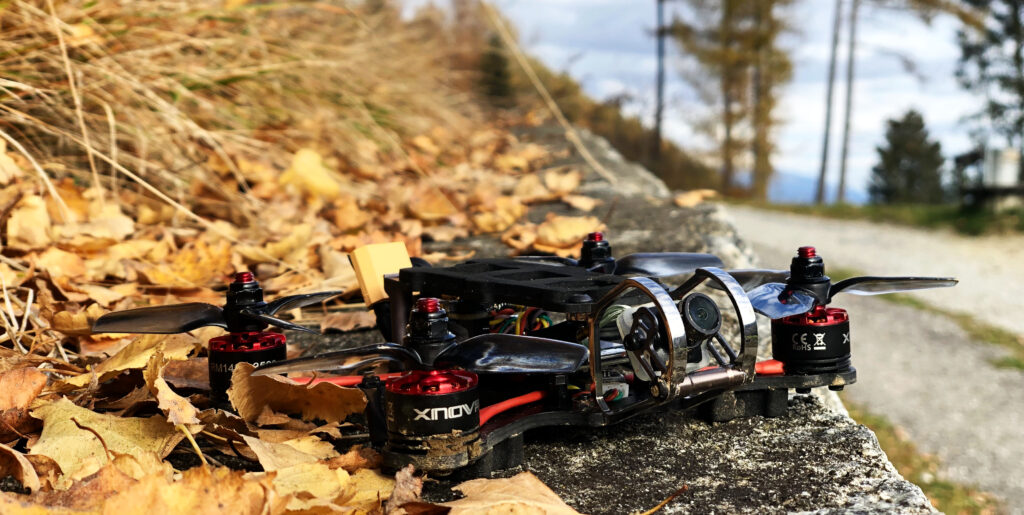
Gallery
Pre-first flight photograph ..